Chapter 5: Using View Templates
Real web applications require the generation of a lot of HTML pages. In the HelloWorld example from Chapter 3, you saw how to generate a string in Python code and return it from a controller action to the user’s browser to produce some visible output.
If you tried to generate a whole web application with lots of different HTML pages by generating strings in Python code, it would quickly become rather cumbersome because the Python language was not specifically designed to make it easy to generate HTML. Instead, it is often helpful to use a templating system.
Rather than writing Python code containing HTML strings, templating systems typically allow you to write HTML directly and embed Python code in your HTML when you need to do so. Since most of your template is likely to be HTML rather than Python, this is often a lot quicker. Templating languages typically also offer simple constructs for substituting variables or repeating certain sections of HTML.
Introducing Mako
Here is a simple template written using Pylons’ default templating language, Mako. It simply prints a personalized greeting:
<html>
<head>
    <title>Greetings</title>
</head>
<body>
    <h1>Greetings</h1>
    <p>Hello ${name}!</p>
</body>
</html>
As you can see, most of the template consists of HTML. Areas of the template that represent Python expressions that add to the content of the template are written inside ${}. In this example, the value of name would replace the ${name} text when the template was rendered.
Let’s see how to use this template in Pylons. Throughout this chapter, you’ll create a new Pylons application that demonstrates various features of Mako, and by the end of the chapter, you will have created a complete set of templates you can use in your own Pylons application.
Start by creating a new project. Once again, you will be asked some questions; you can choose the defaults:
$ paster create --template=pylons TemplateDemo
Selected and implied templates:
  Pylons#pylons  Pylons application template

Variables:
  egg:      TemplateDemo
  package:  templatedemo
  project:  TemplateDemo
Enter template_engine (mako/genshi/jinja/etc: Template language) ['mako']:
Enter sqlalchemy (True/False: Include SQLAlchemy 0.4 configuration) [False]:
Enter google_app_engine (True/False: Setup default appropriate for Google App Engine) [False]:
Creating template pylons
Creating directory ./TemplateDemo
  Recursing into +package+
    Creating ./TemplateDemo/templatedemo/
    Copying __init__.py_tmpl to ./TemplateDemo/templatedemo/__init__.py
    Recursing into config
    ... etc
Remember that the --template option in the previous command refers to project templates used to create a project directory structure for you, whereas this chapter is about view templates used to help render the HTML for a view.
Pylons projects store view templates in the project’s templates directory, but if you want to store them somewhere else, you can configure where Pylons should tell Mako to look to find your view templates by editing your project’s config/environment.py file. By default, it looks like this:
# Create the Mako TemplateLookup, with the default autoescaping
config['pylons.app_globals'].mako_lookup = TemplateLookup(
    directories=paths['templates'],
    ...
)
You can replace paths['templates'] with a list of the places that Mako should search for view templates. Mako searches the directories in order.
Now that the project has been created, let’s test the greeting example you saw earlier. Save the greeting template in the TemplateDemo/templatedemo/templates/ directory as greeting.html.
You’ll also need a controller to test the template. Create a new controller in your TemplateDemo project named greeting:
$ cd TemplateDemo
$ paster controller greeting
Update the index() action of the greeting controller so that it looks like this:
def index(self):
    name = 'Pylons Developer'
    return render('/greeting.html', extra_vars={'name': name})
The render() function is imported at the top of the controller from your project’s lib/base.py file. Within that file you’ll find the import below so the render() function in your controller is really just an alias for Pylons’ render_mako() function:
from pylons.templating import render_mako as render
You’ll look at how to use other templating languages later in the chapter. Also notice that the template paths have to start with a slash (/). This requirement was introduced in Pylons 0.9.6.
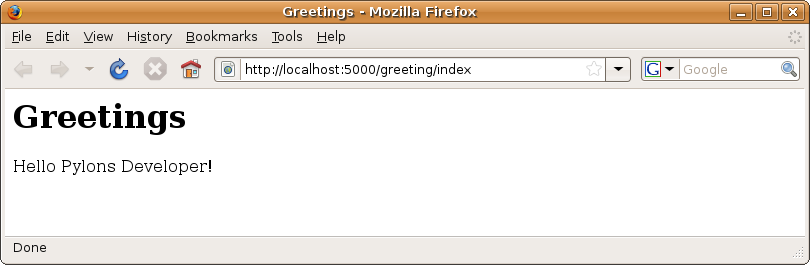
If you start the server with the paster serve --reload development.ini command and visit http://localhost:5000/greeting/index, you should see the Hello Pylons Developer! greeting in your browser (see Figure 5-1).
Using the Template Context c Global
Although passing the name argument directly as an extra argument to render() works perfectly well, it is usually considered a better practice to assign template variables to Pylons via the template context global c, which you learned about in Chapter 3. Here is the updated controller:
def index(self):
    c.name = 'Pylons Developer'
    return render('/greeting.html')
Before you can use the c global, it needs importing into your controller:
from pylons import tmpl_context as c
You might prefer to assign template variables to c rather than pass them in directly as arguments to render() for two reasons:
There is less chance you will accidentally assign a variable that has the same name as either one of the Pylons globals or one of the global names set up by Mako.
If a particular variable is useful in a template, there is a good chance it will be useful elsewhere in your application too. Since the c object is a Pylons global, you can also use objects assigned as attributes of c elsewhere in your application during a request.
Here’s the updated greeting.html template:
<html>
<head>
    <title>Greetings</title>
</head>
<body>
    <h1>Greetings</h1>
    <p>Hello ${c.name}!</p>
</body>
</html>
Notice that this time the call to render() doesn’t include the c global explicitly. Pylons automatically passes this and other globals to Mako anyway, so you don’t need to do so yourself.
If you test this updated example, you will see the same output as before.
Caution!
Be careful when setting c attributes that begin with an underscore (_) character. c and other global variables are really a StackedObjectProxy, which reserve the attribute names _current_obj, _push_object, and _pop_object for their internal methods.
You’ll learn about how these objects actually work under the hood in Chapter 17.
The c global is reset on each request so that you don’t need to worry about a controller still having old values set from a previous request.
One issue you learned about in Chapter 3 is that the c object doesn’t raise an AttributeError when you attempt to access an attribute that doesn’t exist and instead returns an empty string. This behavior is confusing for new Pylons developers (as well as more experienced ones), so it is recommended you disable it by specifying the strict_c option in config/environment.py. Add a new line after the Pylons configuration options:
# CONFIGURATION OPTIONS HERE (note: all config options will override
# any Pylons config options)
config['pylons.strict_c'] = True
The template context global c makes it easy to pass information around your application, but it is available only during a request. As a result, you should be very careful about creating libraries that explicitly rely on it; otherwise, your code might quickly become quite tangled.
As an example, imagine you had assigned the variables name and age to the c object and then created a function that performed some simple formatting. You might be tempted to write it like this:
from pylons import c

def format_age():
    return "Name: %s, Age: %s"%(c.name, c.age)
Although this works perfectly well, it is bad practice—your function can be used only when Pylons is processing an HTTP request because this is the only time the c global is available. It is much better to write your function like this:
def format_age(name, age):
    return "Name: %s, Age: %s"%(name, age)
and then to use it like format_age(c.name, c.age) so that the function itself does not rely on the presence of the c global. This will make it much more obvious how your code works and will make refactoring later much easier.
For the same reason, it is better to avoid using other Pylons globals such as request and response where possible. Being explicit is usually a good idea.
Basic Template Syntax
Now that you’ve seen how a very simple template works, it is time to look in more detail at the template syntax you’ll frequently use when working with Mako templates.
If you’d like to follow along with any of the examples in this section, create a new template called basic.html, and then create a new action in the controller to render it. Because you will return to the greeting.html example later in the chapter so shouldn’t change that template now.
def basic(self):
    return render('/basic.html')
Let’s get started. You’ve already seen basic expression substitution using the ${} construct. You can use any valid Python expression that would be suitable as a function argument within the brackets. Here is an example:
The value of 3 + 5 is: ${3 + 5}
A string representation of 3 to the power 4 is ${pow(3, 4)}
You can add comments to your templates by starting a line with the ## characters. A single # is used quite a lot in templates for CSS selectors and output for various programming languages, so it was decided ## should be used for comments rather than adopting the Python comment format of a single # character.
Make sure the ## characters are at the very start of the line with no whitespace. For example:
## This is a comment which will not be rendered
This will be rendered ## and so will this.
You can also use multiline comments using <%doc> tags. For example:
<%doc>
    This is a multiline comment which will not be rendered. This style of
    comment is particularly useful for documentation as well as situations where
    you want to comment out a large region of your template temporarily during
    testing.
</%doc>
Related to the <%doc> tag is the <%text> tag, which simply outputs verbatim whatever text is specified without treating it as Mako markup. This is very handy for documenting Mako. For example, the following:
<%text>
    This is some Mako syntax which will not be executed: ${variable}
    Neither will this <%doc>be treated as a comment</%doc>
</%text>
produces the unchanged output, as you would expect:
This is some Mako syntax which will not be executed: ${variable}
Neither will this <%doc>be treated as a comment</%doc>
You might need to view the HTML source code to see that this is indeed the output produced because some web browsers, including Internet Explorer, don’t handle tags containing % characters such as the <%doc> and </%doc> tags in this example.
Mako also supports the full range of control structures supported by Python, including if, elif, else, while, and for. These structures are very useful in templates. For example, to control which information is displayed, you might use an if statement:
% if c.name == 'Pylons Developer':
    Welcome Pylons Developer
% else:
    Welcome guest
% endif
These statements work in the same way they would in Python, including the need for a colon (:) at the end of the line. The only difference is that because templates don’t have to conform to the strict indentation rules that Python source code follows, you have to specify the point at which the control structure ends. In this case, you used an % endif line, but if you were using a while loop, for example, you would use % endwhile.
You can, of course, combine control structures too. For example, you might want to generate an HTML list from a data structure that looks like this:
c.links = [
    ('James','http://jimmyg.org'),
    ('Ben','http://groovie.org'),
    ('Philip',''),
]
The template might look like this:
<ul>
% for item in c.links:
    <li>\
% if item[1]:
    <a href="${item[1]}">${item[0]}</a>\
% else:
    ${item[0]}\
% endif
    </li>
% endfor
</ul>
This would generate a list that looked like this:
<ul>
    <li><a href="http://jimmyg.org">James</a></li>
    <li><a href="http://groovie.org">Ben</a></li>
    <li>Philip</li>
</ul>
Notice how the variable item specified in the for loop can still be used as an expression in the ${} construct even though it is generated in a loop and was not directly passed into the template as a namespace argument.
Also, if the bottom % endif statement was not in line with the % if statement, the template would have worked equally well. Mako doesn’t require the same indentation that Python does, although it is usually good practice to properly structure your templates anyway.
The final thing to point out about this example is that it has made extensive use of the \ character, which, when placed at the end of a line, consumes the newline character that follows it to prevent Mako from adding a line break at the end of the line.
Sometimes it is useful to be able to directly write Python code in templates. This can be done with Python blocks, although as has already been described, Python code is really best kept to the controllers where possible to provide a clean interface between your controllers and view. You can use a Python block like this:
<%
    title = 'Pylons Developer'
    names = [x[0] for x in c.links]
%>
Any variables you declare in Python blocks are then available to be used in control statements or in ${} constructs. For example, this code:
% for i, value in enumerate(names):
${i+1}. ${value} <br />
% endfor
produces the following output:
1. James
2. Ben
3. Philip
Any code within Python blocks must be properly indented in the same way normal source code is. The block itself can have any level of indentation. For example, although this code looks messy, it is perfectly valid:
Your title is ${title}
   <%
         # This block can have any indentation as long as the Python
         #  code within it is properly indented
         if title == 'Pylons Developer':
             msg = 'You must program in Python!'
         else:
             msg = ''
     %>
An optional message: ${msg}
The code within these blocks is executed each time the template is rendered.
Because you can put Python expressions in a line containing a Mako control structure such as % if, you might be tempted to think you can write any expression after a % sign, for example, like this:
## The line below is NOT allowed:
% a = 3
Instead, any expressions should be written in blocks.
A variation of the <% %> block places the Python code within it at the top of the cached Python file Mako generates, making it very useful for import statements. Notice the ! character after the start of the first bracket in the following example:
<%!
    import datetime
%>
This is called a module-level block, and when used in the context of a multithreaded Pylons application, the code it contains is executed only the first time a template is executed. Module-level blocks, as the name suggests, are good places for putting module imports, in this case, to make the datetime module available throughout the template. Module-level blocks don’t have access to the usual Mako environment and cannot be used for outputting content. We’ll discuss module-level blocks again when you learn how Mako caches templates later in the chapter.
Tip
So far, all the templates have been designed to generate HTML, but of course you can use templates to generate any sort of text-based file, be it an e-mail, a rich-text document, a configuration file, or a file format specific to your application.
Default Pylons Template Variables
The template context global c is not the only object Pylons passes to Mako for you automatically via the render() function. In addition, the following are set up by default:
- tmpl_context and its alias c
This is the template context object you have already seen. Although it is usually accessed as c, you can also access it within templates as tmpl_context.
- config
This is the Pylons config global described in Chapter 3.
- app_globals and its alias g
This is the project application globals object you learned about in Chapter 3, usually accessed as g but available as app_globals in templates.
- h
This is the project helpers module. In this case, this is templatedemo.lib.helpers, which is the place you should put all your helper functions. Again, these are described in Chapter 3.
- request
This is the Pylons request object for this request.
- response
This is the Pylons response object for this request.
- session
This is the Pylons session object (unless sessions are removed).
- translator, ungettext(), (), and N_()
These are objects to help you with internationalization. You will learn about these in Chapter 11, so you don’t need to worry about them now.
As an example, to add the current URL to the greeting.html template you have been using, you might use the h object. First import the url_for() function into the templatedemo/lib/helpers.py file with this import:
from routes import url_for
Then update the template like this:
<html>
<head>
    <title>Greetings</title>
</head>
<body>
    <h1>Greetings</h1>

    <p>Hello ${c.name}! You are visiting ${h.url_for()}</p>
</body>
</html>
Later in the chapter when you look at custom render() functions, you will see how you can customize which variables are used by default. For more information about template variables, see http://docs.pylonshq.com/views/#default-template-variables.
Mako Runtime Built-Ins
In addition to the Pylons default template variables that the Pylons render() global sets up for you, it is worth being aware that Mako sets up a number of runtime built-ins for you. I’ll mention most of these in the course of this chapter, but for full information about each, you should consult the Mako documentation at http://www.makotemplates.org/docs/documentation.html#runtime_builtins.
Here’s a quick summary so that you can make sure you don’t accidentally use any of these as names of your own variables in templates:
- context
This context is the central object that is created when a template is first executed and is responsible for handling all communication with the outside world. It includes the output buffer and a dictionary of the variables that can be freely referenced within a template; this includes the other Mako runtime built-ins, the Pylons default variables, and any extra variables passed by the extra_variables argument to render(). As such, the context object is very important. You can learn more about it at http://www.makotemplates.org/docs/documentation.html#runtime.
- local, self, parent, and next
These are all namespaces and have particular meanings in the context of template inheritance chains. You’ll look at these later in the chapter.
- capture
This is a function that calls a given def and captures its resulting content into a string, which is returned. A def is Mako terminology for a reusable block of template code wrapped in a <%def> tag that behaves a bit like a function in Python. You’ll learn about defs and the capture() function later in the chapter.
- caller
This is a “mini” namespace created when using the <%call> tag to define a “def call with content.” You don’t deal with caller in this book, but it is well documented at http://www.makotemplates.org/docs/documentation.html#defs_defswithcontent if you are interested.
- UNDEFINED
This is an instance of mako.runtime.Undefined that raises an exception when its __str__() method is called. It is used when you use a variable in a template without assigning it a value. If you see an UNDEFINED, it is likely that you mistyped a variable name or forgot to pass a particular variable to a template.
- pageargs
This dictionary can be specified with the <%page> tag and tells templates the arguments that the body() def takes. You’ll look at the body() def and its use in template inheritance chains later in the book, but for details of pageargs, consult the Mako documentation at http://www.makotemplates.org/docs/documentation.html#namespaces_body.
Three very useful methods of the context object are get(), keys(), and write(). Here’s an example demonstrating how they are each used:
<html>
<body>
<%
    context.write('<p>Here is an example:</p>')
%>
<p>
% for key in context.keys():
The key is <tt>${key}</tt>, the value is ${str(context.get(key))}. <br />
% endfor
</p>
</body>
</html>
Create a new template called context.html, and add a new action to the controller to test it like this:
def context(self):
    return render('/context.html')
If you visit http://localhost:5000/greeting/context, a long list of output is produced, including all the variables that can be used in templates. The source starts like this:
<html>
<body>
<p>Here is an example:</p>
<p>
The key is <tt>all</tt>, the value is <built-in function all>. <br />
The key is <tt>help</tt>, the value is Type help() for interactive help, or help(object) for help about object.. <br />
The key is <tt>vars</tt>, the value is <built-in function vars>. <br />
The key is <tt>SyntaxError</tt>, the value is <type 'exceptions.SyntaxError'>. <br />
The key is <tt>session</tt>, the value is {}. <br />
The key is <tt>unicode</tt>, the value is <type 'unicode'>. <br />
The key is <tt>sorted</tt>, the value is <built-in function sorted>. <br />
...
The two important things to realize are that writing output with context.write() has the same effect as using ${} and that any variables that can be used in a template can be accessed with context.get().
Separation of Logic and View
The greeting example you have been using so far is rather artificial because you could have just put your name directly into the template. Real web applications respond to data from various sources, so let’s make our example slightly more realistic by retrieving the name of the visitor from the query string on each request. If no query string is present, you’ll just use Visitor as the name.
def index(self):
    c.name = request.params.get('name', 'Visitor')
    return render('/greeting.html')
If you were now to visit http://localhost:5000/greeting/index?name=Pylons+Developer, you would see the same greeting as the first example.
This is a much more realistic example. Here the controller does some processing based on some logic and then passes relevant information to the template to display. In this setup, the template represents a view of the data in the Model View Controller architecture, and in line with this architecture, it is generally considered best practice to keep logic code in your controller and use Python only in your template to assist with rendering the information passed by the controller.
Some templating languages take the separation of logic code and view code to extremes and actively prohibit any sort of data processing in the template. Although this might be good practice, it can be sometimes be terribly frustrating when you want to do something simple if the templating language prevents you from doing it. Mako takes the view that the developer knows best and therefore provides some powerful templating tools and the ability to embed Python code in the template. It is then up to you as a developer to decide how much to use the tools Mako provides.
Here is the same example written slightly differently just to demonstrate that you can put simple logic in templates if you really need to do so. Here’s the action:
def index(self):
    return render('/greeting.html')
and here’s the new template:
<html>
<head>
    <title>Greetings</title>
</head>
<body>
    <h1>Greetings</h1>
    <p>Hello ${request.params.get('name', 'Visitor')}!</p>
</body>
</html>
Security Considerations and WebHelpers
One point to watch out for when you are using any data from the Web in a template is that a malicious user might put HTML characters in the data. If, for example, you visit the URL http://localhost:5000/greeting/index?name=Ja%3Cb%3Em%3C%2Fb%3Ees, the value of request.params['name'] would be Ja<b>m</b>es, and if Mako didn’t apply any special escaping, this value would be rendered, resulting in the m being made bold in the HTML rendered by the browser.
In itself this might not seem like a big problem, but actually it opens your web application up to so-called cross-site scripting (XSS) attacks. For example, a malicious user could insert JavaScript into your page to replace some of your own content to trick the user of the page into giving away information or visiting a site they didn’t intend to because they thought the content on the page was generated by you.
This is a real risk for many websites today, so it is well worth being aware of. Pylons protects you from making this mistake by automatically escaping all values rendered by Mako. If you look at your project’s config/environment.py again, you will see that the full configuration for Mako looks like this:
# Create the Mako TemplateLookup, with the default autoescaping
config['pylons.app_globals'].mako_lookup = TemplateLookup(
    directories=paths['templates'],
    module_directory=os.path.join(app_conf['cache_dir'], 'templates'),
    input_encoding='utf-8', output_encoding='utf-8',
    imports=['from webhelpers.html import escape'],
    default_filters=['escape'])
The last argument, default_filters, means that all output is filtered through the webhelpers.html.escape function, which automatically applies HTML escaping to make the content safe.
Of course, sometimes you want to pass data to Mako and have it treated as HTML. To do this, you have to wrap the content in a webhelpers.html.literal() object. A literal is a special type derived from Python’s built-in unicode type. When the escape() function finds a literal, it doesn’t escape it.
To demonstrate these features, update the greeting.html template so it looks like this:
<html>
<head>
    <title>Greetings</title>
</head>
<body>
    <h1>Greetings</h1>

    <p>${c.greeting} ${c.name}!</p>
</body>
</html>
Rather than using the webhelpers.html.literal object directly, most Pylons developers prefer to import it into their project’s lib/helpers.py file so that it can be accessed as h.literal in controllers.
Update the lib/helpers.py file to include this import:
"""Helper functions

Consists of functions to typically be used within templates, but also
available to Controllers. This module is available to both as 'h'.
"""
# Import helpers as desired, or define your own, ie:
# from webhelpers.html.tags import checkbox, password

from webhelpers.html import literal
Now import the helpers module into your controller as h by adding this at the top of controllers/greeting.py:
import templatedemo.lib.helpers as h
Finally, change the index() action of the controller to look like this:
def index(self):
    c.greeting = h.literal('<b>Welcome</b>')
    c.name = request.params.get('name', 'Visitor')
    return render('/greeting.html')
Now visit http://localhost:5000/greeting/index?name=Ja%3Cb%3Em%3C%2Fb%3Ees, and you will see that the HTML wrapped in literal() is rendered as an HTML literal, whereas the data passed to Mako from the request object is correctly escaped and the < and > characters are rendered correctly.
Writing Your Own Helpers
As of WebHelpers 0.6, all the HTML helper functions automatically return literal() objects, described earlier, so that their return values are treated as HTML. If you have created your own helper functions for a previous version of Pylons and try to use them with a Pylons 0.9.7 application, you will probably be surprised to find that all the output is escaped. You can solve this problem by modifying the helper functions to return an HTML literal object instead of a Python unicode or str object.
When writing or upgrading helper functions to use HTML literals, you should be careful that you don’t accidentally introduce security holes. For example, consider this function:
from webhelpers.html import literal

def emphasize(value):
    return literal('<em>'+value+'</em>')
Imagine you used this in your greeting action like this:
c.name = emphasize(request.params.get('name', 'Visitor'))
You have introduced a security hole because the Ja<b>m</b>es string is concatenated with the <em> and </em> strings in the emphasize() helper, and the whole string <em>Ja<b>m</b>es</em> is marked as a literal. The <b> and </b> tags now pass through the escape() function and through to the HTML document. This is not the behavior you want. Instead, the emphasize() function should be written like the following so the value itself isn’t accidentally marked as an HTML literal:
def emphasize(value):
    return literal('<em>') + value + literal('</em>')
To avoid the problem, WebHelpers 0.6 introduced an HTML object that can be used for generating HTML fragments in a safe way. Here is the emphasize helper written using the HTML object:
def emphasize(value):
    return HTML.em(value)
You can also nest HTML objects; the following would also wrap the value in a <span> tag:
def emphasize(value):
    return HTML.span(HTML.em(value))
You can also add HTML attributes as keyword arguments to HTML. Where an attribute name is a reserved word in Python, you should add _ to the end of the argument. For example, here is a <span> tag with an id attribute of first and a class attribute of highlight:
def emphasize(value):
    return HTML.span(HTML.em(value), id='first', class_='highlight')
Calling emphasize('Ja<b>m</b>es') would return a literal object representing the Unicode string u'<span id="first" class="highlight"><em>Ja<m>es</em></span>' with the HTML characters from the argument correctly escaped.
See the WebHelpers documentation for more information at http://docs.pylonshq.com/thirdparty/webhelpers/html/html/.
Applying Filters in Templates
The escape() function set up as a default filter in config/environment.py is applied to all Mako output, but you can also apply filters to specific Mako output by using Mako’s | operator within a ${} expression in a template.
The built-in escape functions are as follows:
- u
This produces URL escaping, provided by urllib.quote_plus(string.encode('utf-8')).
- h
This produces HTML escaping, provided by cgi.escape(string, True). Note that this is not the same as the helpers module object h, which is also available in templates. Mako knows when you are using h as a filter and when it is supposed to refer to your project’s helpers module.
- x
This produces XML escaping.
- trim
This produces whitespace trimming, provided by string.strip().
- entity
This produces HTML entity references for applicable strings, derived from the htmlentitydefs module in the standard library.
- unicode
This produces a Python Unicode string (this function is applied by default).
- decode.<some encoding>
This decodes input into a Python Unicode string with the specified encoding.
- n
This disables all default filtering; only filters specified in the local expression tag will be applied.
You can also use the escape function because Mako is configured by the following line to automatically import into all templates:
imports=['from webhelpers.html import escape'],
Here’s an example of how filtering works:
${ c.test | trim,entity }
If c.test had the value u" It will cost £5 ", the spaces would be stripped by trim, the £ sign would be converted to the HTML entity £, and the output would simply be It will cost £5.
If you have an HTML string that is not wrapped in literal() but that shouldn’t be escaped, you can disable the default escape filter with n. For example, if c.test contained the Unicode string u'<b>Hello</b>', you could have this passed through unescaped like this:
${ c.test | n}
Structuring Template Code
The ability to substitute variables, control program flow, and execute small snippets of Python are all very useful, but what gives templates their real value is the ability to define template blocks and call them from other templates to produce complex page layouts with as little duplication of effort as possible. In the following sections, you’ll learn about some of the ways Mako allows you to do this.
Using <%def> Blocks
A def block is rather like a Python function in that each def block has a name, can accept arguments, and can be called. As an example, let’s update the list-generating code you used earlier to be a reusable def block:
<%
    items = [
        ('James', 'http://jimmyg.org'),
        ('Ben', 'http://groovie.org'),
        ('Philip', ''),
    ]
%>

${navigation_links('James', items)}

<%def name="navigation_links(selected, links)">
    <%def name="link(label, url)">
        % if url:
            <a href="${url}">${label}</a>
        % else:
            ${label}
        % endif
    </%def>


    % for item in links:
        <li>\
    % if item[0] == selected:
        <b>${link(item[0], item[1])}</b>\
    % else:
        ${link(item[0], item[1])}\
    % endif
        </li>
    % endfor
    </ul>
</%def>
There’s quite a lot going on in this example, so let’s take it piece by piece. You can see you have two functions. The first is called navigation_links() and takes two arguments: selected is the label of the currently selected navigation link, and links is the list of links.
Within the navigation_links() function, there is another function called link() that generates an HTML link if a URL is associated with the navigation link.
Finally, there is a definition of the links defined in Python block at the top and some code to call the navigation_links() function at the bottom. Save this template code as navigation.html. You can then test it by adding a new action to the controller:
def navigation(self):
    return render('/navigation.html')
The template generates the following HTML source:
<ul>
    <li>        <b>
        <a href="http://jimmyg.org">James</a>
</b>        </li>
    <li>
        <a href="http://groovie.org">Ben</a>

        </li>
    <li>
        Philip
        </li>
</ul>
The extra whitespace is because you have concentrated on making your template look neat rather than concentrating on the HTML output. To remove all the whitespace, your HTML statements would have to begin at the start of the line because by default Mako does not strip out whitespace.
Notice that you have controlled some of the line endings, though. Leaving a trailing \ character at the end of the line tells Mako not to insert a line end character, so you can see there is no line end after the </b> tag even though there is some whitespace, which comes from the following line in the template before the </li> tag.
Defs in Mako behave very similarly to functions in Python and have access to their parent scope. This means you would be able to use the selected and links variables within the link() def.
You might also have noticed that the navigation_links() function was called before its definition. All top-level functions are loaded into memory before the main body of the template is rendered, so this is perfectly acceptable too.
The link() def is called from within navigation_links(). Just like in Python, the link() function would not be callable from outside navigation_links() because it is local to the navigation_links() scope.
The Mako Cache
It can sometimes be difficult to remember exactly what rules apply to defs, particularly when you get involved with more complex examples such as the inheritance chains you’ll see later in the chapter. Luckily, there is an easy way to find out what is going on behind the scenes.
Mako works by compiling the templates you write into ordinary Python code the very first time it is executed or any time it is executed after it has been changed. Any subsequent times the template is rendered, the Python file is simply executed, and the output is returned.
Mako caches these templates according to the value of the cache_dir variable in your project’s development.ini file. By default, this is set to the value %(here)s/data. The %(here)s value gets replaced with the location of the development.ini file, so Mako will cache the files in your project’s data/templates directory by default.
Let’s have a look at the cached template for the navigation.html template you’ve just created. Its cached counterpart is in TemplateDemo/data/templates/navigation.html.py. Let’s look at each part of the file in turn starting with the top:
from mako import runtime, filters, cache
UNDEFINED = runtime.UNDEFINED
__M_dict_builtin = dict
__M_locals_builtin = locals
_magic_number = 4
_modified_time = 1219507190.1808441

_template_filename='/Users/james/TemplateDemo/templatedemo/templates/navigation.html'
_template_uri='/navigation.html'
_template_cache=cache.Cache(__name__, _modified_time)
_source_encoding='utf-8'
from webhelpers.html import escape
_exports = ['navigation_links']
Here Mako defines various variables related to your template. You can see the import of the escape function that was specified as an argument to the TemplateLookup in your project’s config/environment.py file. If you had defined any module-level blocks, their contents would also be placed in this part of the cache.
Next is the render_body() function that represents the main body of each template:
def render_body(context,**pageargs):
    context.caller_stack._push_frame()
    try:
        __M_locals = __M_dict_builtin(pageargs=pageargs)
        def navigation_links(selected,links):
            return render_navigation_links(context.locals_(__M_locals),selected,links)
        __M_writer = context.writer()
        # SOURCE LINE 1

        items = [
            ('James', 'http://jimmyg.org'),
            ('Ben', 'http://groovie.org'),
            ('Philip', ''),
        ]


        __M_locals.update(__M_dict_builtin([(__M_key, __M_locals_builtin()[__M_key]) for __M_key in ['items'] if __M_key in __M_locals_builtin()]))
        # SOURCE LINE 7
        __M_writer(u'\n\n')
        # SOURCE LINE 9
        __M_writer(escape(navigation_links('James', items)))
        __M_writer(u'    \n\n')
        # SOURCE LINE 31
        __M_writer(u'\n\n\n\n')
        return ''
    finally:
        context.caller_stack._pop_frame()
In this case, you can see the items list being defined and the call to navigation_links() being made. This in turn calls the render_navigation_links() function, which is rather long, so I won’t repeat it here.
Each part of the cached template is simply normal Python code even though some of the variables start with __M_ to avoid the risk of naming conflicts. You can also see the escape() function being used, so it is clear which variables are escaped and which aren’t.
If you look carefully at the render_body() method, you’ll notice context.caller_stack.push_frame() is called at the start of the rendering and context.caller_stack.pop_frame() is called at the end. These two calls help Mako keep track of where it is in the inheritance chains you will learn about later in the chapter.
Although you would never use the cached Mako templates directly, it is helpful to realize they are there. If you ever run into difficulties, looking at the cached version can sometimes shed light on a problem.
Capturing Output
Something to be aware of when calling defs is that their output is rendered straight to the context output buffer—it isn’t actually returned.
If you look at the cached template example again, it should be clear why. Each line of source template is wrapped in an __M_writer() call, which has the effect of calling context.write(). If you want to actually capture the output of a def to a variable rather than to the output buffer, you have to use capture().
For example, consider this:
<%def name="add(num1, num2)">
${num1+num2}
</%def>

<%def name="display(num1, num2, result)">
The result of ${num1} + ${num2} is ${result}
</%def>

${display(1, 2, add(1,2))}
Running this example produces the following HTML source (although you won’t see the line breaks in a web browser):
3

The result of 1 + 2 is None
What happens here is that the output of the add() def is written to the output buffer, not captured and passed to the display() def. The add() def actually returns None, which is the value returned by ordinary Python functions if no value is explicitly returned. Instead, you want to capture the output from the add() def. You can do this by modifying the line that calls it to look like this:
${display(1, 2, capture(add, 1, 2))}
The capture function is one of Mako’s built-in template variables. It takes the def to capture as the first argument and the values to pass to the def as the subsequent arguments. The new output is as follows:
The result of 1 + 2 is 3
If you are interested, you can read more about Mako’s output buffering in the Mako documentation.
Namespaces
In a real web application, it is likely that most of the pages will need navigation links, so it would be useful if you could import the navigation_links() function you have just created into other templates. You can do this using the <%namespace> tag.
Update the greeting.html template so that it imports and uses the navigation_links() function from the template you just created.
<%namespace name="nav" file="/navigation.html" />

<html>
<head>
    <title>Greetings</title>
</head>
<body>
    <h1>Greetings</h1>

    ${nav.navigation_links('Ben', links=[
        ('James','http://jimmyg.org'),
        ('Ben','http://groovie.org'),
        ('Philip',''),
    ])}

    <p>${c.greeting} ${c.name}!</p>
</body>
</html>
The <%namespace> tag takes a file argument to specify the template you want to import and a name argument to specify the namespace under which the defs should be imported.
You can then use the nav namespace to generate navigation links in the greetings template.
Sometimes it is useful to have the components imported directly into the local namespace rather than a namespace of their own. This is possible too using this alternative syntax:
<%namespace file="navigation.html" import="navigation_links" />

${navigation_links('James', type='list', links=[
    ['James','http://jimmyg.org'],
    ['Ben','http://groovie.org'],
    ['Philip',''],
])}
When the import attribute is used, the name attribute is optional.
You can also just use import="*" to import everything from another template or import="component1, component2" to specify specific components you want to import. The names imported by the import attribute take precedence over any names that exist within the current context.
Namespaces can also import regular Python functions from modules as long as they accept an argument named context as their first argument. As an example, a module file my/module.py might contain the following callable:
def write_greeting(context):
    context.write("hello world")
A template can then use this module as follows:
<%namespace name="my" module="my.module" />

${my.write_greeting()}
Note that the context argument is not needed in the call. When Mako generates the cached Python version, it creates a locally scoped callable, which is responsible for passing the context object in for you.
The body() Def
There is one other important <%def> you will need to know about called the body() def. The body() def represents the whole of the body of the template, that is, any template code not wrapped in its own def. For example, if you had a template that looked like this, the 12:00pm line would be in the body() def.
<%def name="test()">Hello World!</%def>

12:00pm
You can see this in action by using this template in another one. Imagine the previous template was saved as greeting_and_time.html. You could create another template like this to use its functionality under the namespace other:
<%namespace name="other" file="/greeting_and_time.html" />

The greeting is ${other.test()}
The time is ${other.body()}
Notice how the calling body method is effectively just like a normal <%def> but without the opening and closing <%def> tags needing to be specified. The output is as you would expect:
The greeting is Hello World!
The time is 12:00pm
Being able to access the body of a template is really useful when you are using template chains in an inheritance structure. Let’s look at this in the next section.
Template Inheritance Chains
The real value of templating languages isn’t so much that they help you mix and match Python and plain text in a more efficient manner but that so much of their functionality can be reused effectively in other pages. You’ve already seen how you can create reusable components using <%def> blocks and then import them into other templates using the <%namespace> tag, but Mako also provides facilities to enable you to structure your templates so that derived templates can inherit functionality from a base template.
Simple Inheritance
Using a template chain in Mako is best explained with an example. The following is a base template named base.html, which defines some HTML and a footer but also has two defs, self.title() and self.body(). Save this template as base.html in templatedemo/templates:
<html>
    <head>
        <title>${self.title()}</title>
    </head>
    <body>
        ${self.body()}
        <div class="footer">
            <p>This is a simple page footer</p>
        </div>
    </body>
</html>
Let’s modify the greeting example to use this template. Let’s ignore the namespace code you added earlier in the chapter for the minute and just concentrate on inheriting the base template. Here’s how it looks:
<%inherit file="/base.html"/>\
<%def name="title()">Greetings</%def>
<h1>Greetings</h1>

<p>${c.greeting} ${c.name}!</p>
Save this new version of greeting.html. The index() action of the greeting controller should still look like this:
def index(self):
    c.greeting = h.literal('<b>Welcome</b>')
    c.name = request.params.get('name', 'Visitor')
    return render('/greeting.html')
If you visit http://localhost:5000/greeting/index in your browser again, you will see the following HTML rendered:
<html>
    <head>
        <title>Greetings</title>
    </head>
    <body>

<h1>Greetings</h1>

<p><b>Welcome</b> Visitor!</p>

        <div class="footer">
            <p>This is a simple page footer</p>
        </div>
    </body>
</html>
Let’s think about what is going on to produce this HTML. Because greeting.html inherits from the base.html control for rendering passes directly to the base.html body() def. The <html> line is rendered first, followed by all the other characters until ${self.title()} is called.
In the context of rendering a normal template, self would refer to the template itself, but in the context of an inheritance chain like this one, self always refers to the template at the bottom of the inheritance chain, which is always the template that was originally specified in the call to render(), in this case, greeting.html. This means that although you are rendering the base.html body() def, ${self.title()} refers to the title() def in greeting.html. This renders the Greeting text, which appears in the page title.
Once the title is rendered, control passes back to the base.html template, and more HTML is rendered until ${self.body()} is reached. Once again, self refers to greeting.html, so the body() def of greeting.html is rendered. Finally, control passes back to base.html to render the footer, and the whole page is rendered.
As you can imagine, being able to structure your templates like this is really useful because it means you can now create multiple templates based on base.html without having to duplicate its content in each child template. By using defs in the way you used title(), you can create regions that can be replaced in child templates. These don’t just have to contain static text; they can also contain navigation elements, CSS, JavaScript, section headings, or any other content you like. When you start the SimpleSite tutorial, you’ll use inheritance chains to create a full-featured site.
Caution!
If you are following the Mako documentation, you should be aware that Mako describes the template at the top of the chain (base.html in our example) as being the bottom-most template and the template at the bottom as being the top-most template, so you need to be aware of the slightly confusing terminology.
In the previous example, you used the self namespace to effectively mean “use the def from the template furthest down the inheritance chain.” Mako also provides two related namespaces called next and parent, which are especially useful if you have more than two templates involved in an inheritance chain.
Next Namespace
Imagine the greeting template you’ve been using is actually part of the user administration section of a site. This site might also need some section links to allow the user to navigate around the section, but if these links were put in the base.html template, they would appear on all pages in the site, not just in the user administration section. You could put the links in the greeting.html template, but then you would also have to duplicate them in other templates in the same section. You could do this by keeping the links in a namespace and simply calling the def in each template rather than duplicating the code each time, but Mako provides a better solution.
It turns out that you aren’t limited to two templates in an inheritance chain; you can have as many templates as you like. Rather than inheriting the greeting.html template from the base.html template, let’s create a new template specifically for the user administration section; call it section.html, and save this file in the templatedemo/templates directory with the following content (there is a deliberate mistake in this template, though, so you might want to read on first):
<%inherit file="/base.html"/>
<%namespace file="/navigation.html" import="navigation_links" />

${navigation_links('Admin Home', links=[
    ('Admin Home', '/admin'),
    ('Settings', '/admin/settings'),
    ('Sign Out', '/admin/signout'),
])}

${self.body()}

<%def name="title()">User Administration</%def>
Notice that this template inherits from base.html and that you are still using the navigation.html template you created earlier to do the hard work of creating the links.
For the greeting.html template to use this template, you need to change its <%inherit> tag to look like this:
<%inherit file="/section.html"/>\
If you refresh the browser, you will see that the content hasn’t changed! This might surprise you, so let’s think about what’s happened. You call render() to render greeting.html, and control is passed to the section.html body() def, but this template is inherited from base.html, so control passes to the base.html body() def. Once again, HTML is rendered until ${self.title()} is reached. Remember that self refers to the last template in the chain, in this case, greeting.html, so it is the greeting.html title() def and body() def that are rendered, not the ones in section.html.
To solve this problem, you need to use Mako’s next namespace. next is similar to self but refers to the next template in the chain, not the last one. To use next, you’ll need to change all the references to ${self.title()} and ${self.body()} in base.html and section.html to use ${next.title()} and ${next.body()}, respectively.
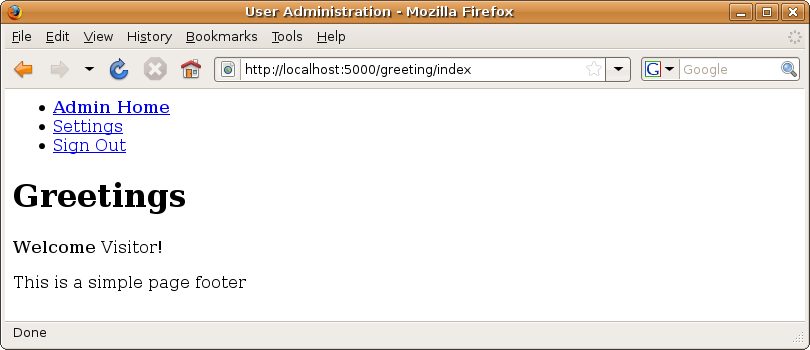
Once you’ve updated the templates, they behave as you expect. When ${next.title()} is reached, the title() def from section.html is rendered. Control is passed back to base.html until ${next.body()} is reached; then the body() def of section.html is rendered, producing the navigation links. When ${next body()} is reached in section.html, the body() def from greeting is rendered. When it is finished, control passes back to section.html and then back to base.html to finish off the rendering.
Figure 5-2 shows the result.
If the section.html template didn’t have a title() def, the call to ${next.title()} in base.html would have rendered the title() def in greeting.html instead.
Middle templates such as section.html are normally used for sections of the site in this way with base templates such as base.html containing content that applies to every page and child templates such as greeting.html containing only page-specific information. Of course, if you have a large site, it might make sense to have more than one middle template so that you can implement subsections or different page layouts within a section. The inheritance technique is very flexible.
Parent Namespace
In the same way that the next namespace allows you to refer to a def in the namespace of the child template immediately below it, Mako also provides a parent namespace that allows a child template to refer to a def in the parent template immediately above it. This is useful if you want a child template to be able to control where in a parent template its content is inserted.
Note
Using the parent namespace might remind you of using super in a derived class to access a method in a base class in a normal Python inheritance structure. The two are similar, but in Python there is no equivalent to the next namespace; that is, you cannot access a child method from a parent class.
Let’s change the way the title() def works so that greeting.html can decide whether to include the content from the section.html body() def. The first thing you need to do is change base.html so that it calls ${self.title()} rather than ${next.title()}. This means that when the title is rendered, control for rendering the def will pass to greeting.html, bypassing section.html.
<html>
    <head>
        <title>${self.title()}</title>
        ...
If you tested the example, you will see that the page title now displays Greetings again. Now let’s change greeting.html so that the title also includes the section title. You’d like the title to read “User Administration > Greetings.” Update the title() def in greeting.html to look like this:
<%def name="title()">${parent.title()} > Greetings</%def>
Now when control for rendering the title() def passes from base.html to greeting.html, the greeting.html title() def calls its parent template title() def where the User Administration string is rendered as expected.
Using the parent namespace in this way is particularly useful when working with sections containing JavaScript or CSS, because you’ll often find that it is useful to be able to control whether the JavaScript and CSS for the child template is rendered before or after that of the parent.
In summary, the rule of thumb is that if the base template should have control of where the child content should be placed, use next. If the child template needs control of where its own content is placed, use parent.
Behind the Scenes
Now that you have a good idea of how to use Mako templates within Pylons, you can turn your attention to how Pylons links the render() function you call to the template engine code as well as how it adds default variables. Once you understand the basic principles, you’ll look at how to use the alternative template languages Pylons supports, as well as how to add support for your own template languages.
If you intend to use only Mako in your Pylons applications and are not interested in understanding what is going on behind the scenes, you might prefer to jump ahead to the next chapter to begin learning about forms.
Let’s start by looking at the definition of the pylons.templating.render_mako() function that you imported as render() in the greeting controller. It looks something like this:
def render_mako(template_name, extra_vars=None, cache_key=None,
                cache_type=None, cache_expire=None):
    def render_template():
        globs = extra_vars or {}
        globs.update(pylons_globals())
        template = globs['app_globals'].mako_lookup.get_template(template_name)
        return template.render(**globs)

    return cached_template(template_name, render_template, cache_key=cache_key,
                           cache_type=cache_type, cache_expire=cache_expire)
The first thing you should notice is that the function supports caching with a call to cached_template(). You’ll look at the caching options in a minute, but let’s start by looking at what happens in the render_template() function.
First, a dictionary is set up called globs, which contains any values you specified in the extra_vars keyword. This dictionary is then updated with all the Pylons globals that I described earlier in the “Default Pylons Template Variables” section. These are returned automatically by the pylons_globals() function.
One of the globals returned is the app_globals object, which you’ll remember from Chapter 3, is an instance of your project’s templatedemo.lib.app_globals.Globals class. This class has an attribute called mako_lookup, but if you look at your project’s templatedemo/lib/app_globals.py file, you’ll see that mako_lookup isn’t defined there. It is actually added dynamically when the application is first loaded by the configuration code in config/environment.py. Here are the relevant lines. You’ll recall that you looked at the options to TemplateLookup earlier in the chapter:
def load_environment(global_conf, app_conf):
    ...
    config['pylons.app_globals'] = app_globals.Globals()
    ...
    config['pylons.app_globals'].mako_lookup = TemplateLookup(...)
    ...
Once the template has been returned, the final act of the render_template() function is to return the rendered template, passing in the variables you have specified as keyword arguments.
As you can see, although it takes a careful look through the code, the templating setup is actually easy to understand. This is typical of the way most of Pylons works. With a little digging through the source code, you can usually work out what is going on and customize the behavior you want in your own Pylons application.
Tip
Don’t be afraid to look at the Pylons source code. It is available online at http://pylonshq.com/hg.
Caching
Sometimes it is useful to be able to cache template calls to speed up performance. As you’ve seen, the render_mako() function has a number of options to support this, each of which defaults to None if it is not specified:
- cache_key
This is the key to cache this copy of the template under.
- cache_type
This is the cache type. Valid options are dbm, file, memory, database, or memcached.
- cache_expire
This is the time in seconds to cache this template with this cache_key. Or use never to designate that the cache should never expire.
These options are then used, along with the template name, to cache the result of the call to the render_template() function I’ve just described. The caching functionality comes from the Beaker package and is described in detail at http://docs.pylonshq.com/caching/. Pylons also supports sophisticated caching options to cache other types of data and supports other types of caching, but these are beyond the scope of the book; have a look at the previously mentioned link for the full information.
To test the caching, let’s modify the base.html template to add the current date and time to the footer of every page. Change the template to look like this:
<%!
    import datetime
%>
<html>
    <head>
        <title>${self.title()}</title>
    </head>
    <body>
        ${next.body()}
        <div class="footer">
            <p>Page generated at ${str(datetime.datetime.now())}</p>
        </div>
    </body>
</html>
When you visit http://localhost:5000/greeting/index this time, the footer will show the exact time the page was generated. For example:
Page generated at 2008-08-24 15:40:10.568216
Now modify the controller to add some caching:
def index(self):
    c.greeting = h.literal('<b>Welcome</b>')
    c.name = request.params.get('name', 'Visitor')
    return render('/greeting.html', cache_expire=5)
Now the first time you visit the page, the current time will be displayed, but every subsequent visit will result in the page being returned from the cache until five seconds have passed. After five seconds, a new page will be rendered with a new date and time, but once again, this new page will be returned from the cache only after five seconds have passed.
If no cache_type is specified, the default used is dbm, which stores the cached pages in a simple database within your cache directory. Have a look at data/cache, and you will see the data folders present where the cache has been stored on disk. If you don’t specify a cache_key, the key default is used. Specifying never as the cache_expire argument will mean the cache won’t expire. Obviously, though, if you are using the memory cache type, restarting the server will cause the cache to be emptied.
Alternative Template Languages
As well as supporting Mako, Pylons supports these template languages out of the box:
- Jinja 1 (http://jinja.pocoo.org/):
This describes itself as a state-of-the-art, general-purpose template engine. It was originally inspired by Django’s template syntax.
- Genshi (http://genshi.edgewall.org/):
This is an XML templating language designed to make generating valid XHTML and XML straightforward. Genshi is very popular with Pylons programmers and is used as the default templating language in TurboGears.
All three template engines are very different, but they each have one thing in common: they are all written as improvements to existing template engines. Genshi is the formal successor of Kid, Mako replaced Myghty, and Jinja was inspired by Django templates. This means all three are well-thought-out and production-ready template systems. They all use Unicode internally and have an API that is easy to use with Pylons.
Deciding between them is really a matter of preference. If you are primarily writing an application that outputs XML or XHTML, then you might find Genshi useful because it guarantees that your output is well formed. On the other hand, Mako and Jinja are much faster than Genshi and allow much more flexibility in the output they produce. Genshi requires a completely different syntax for text-based output, but if you are writing a predominantly XHTML-based application, this may not be a problem. All three handle the escaping of data correctly with Pylons thanks to the use of the HTML literals I described earlier.
If you are fairly new to templating languages and are trying to pick a templating language to use with Pylons, Mako is a good choice, and that is why it was chosen to be the default templating language for Pylons. Of course, Pylons doesn’t restrict you to using a single templating language. If you think it would be helpful in your application, you can use multiple templating languages at the same time. You’ll see how to do this later in the chapter.
To use an alternative template language, you will need to first install it:
$ easy_install Genshi
$ easy_install Jinja
If you want to use one of the alternative templating languages in your project but don’t need Mako support, the easiest thing to do is to specify the templating language you want when you run the paster create command. For example, to get a Genshi project, you might do this, specifying genshi when prompted:
$ paster create --template=pylons GenshiTemplateDemo
Selected and implied templates:
  Pylons#pylons  Pylons application template

Variables:
  egg:      GenshiTemplateDemo
  package:  genshitemplatedemo
  project:  GenshiTemplateDemo
Enter template_engine (mako/genshi/jinja/etc: Template language) ['mako']: genshi
...
This will set up config/environment.py with the following lines:
# Create the Genshi TemplateLoader
config['pylons.app_globals'].genshi_loader = TemplateLoader(
    paths['templates'], auto_reload=True)
Then in your lib/base.py file, rather than importing the render_mako() function, you would import render_genshi() like this:
from pylons.templating import render_genshi as render
Genshi doesn’t generate output directly; instead, it generates a stream of nodes. Genshi streams can be serialized using one of four methods: xml, xhtml, html, or text. The render_genshi() function takes an extra argument named method that you can use to specify the output method. It defaults to xhtml, but you can choose a different value if you want a different type of output.
You can follow a similar process to set up a project to work exclusively with Jinja, specifying jinja when prompted by paster create and using the render_jinja() function in your controllers.
Multiple Template Languages
As was mentioned a moment ago, nothing is stopping you from using more than one templating language in your Pylons application. This requires a little more work because you must add the template lookup code to config/environment.py yourself. This isn’t difficult, though.
Let’s modify the TemplateDemo example you’ve been using to add Jinja support too. First install Jinja:
$ easy_install "Jinja==1.2"
Now open config/environment.py, and change the end of the load_environment() function to look like this:
# CONFIGURATION OPTIONS HERE (note: all config options will override
# any Pylons config options)

# Import the jinja components we need
from jinja import ChoiceLoader, Environment, FileSystemLoader

# Create the Jinja Environment
config['pylons.app_globals'].jinja_env = Environment(loader=ChoiceLoader(
        [FileSystemLoader(path) for path in paths['templates']]))

# Jinja's unable to request c's attributes without strict_c
config['pylons.strict_c'] = True
Jinja will look in the same location as Mako for its files. If you wanted to keep the templates for each in different directories, you could specify different paths for each.
Let’s create a simple Jinja template:
<!DOCTYPE HTML PUBLIC "-//W3C//DTD HTML 4.01//EN">
<html lang="en">
<head>
    <title>Jinja Greeting</title>
</head>
<body>
    <h1>Jinja Greeting</h1>
    {{ c.greeting }}
</body>
</html>
Save this in the templates directory as jinja.html. Now you need a new action in the greeting controller:
def jinja(self):
    c.greeting = 'Hi from Jinja!'
    return render_jinja('/jinja.html')
You’ll need to import the Jinja render function:
from pylons.templating import render_jinja
If you test the example, you’ll see the Hi from Jinja! greeting.
Working with Your Own Templating Language
One of the great benefits of choosing a web framework based on Python is the sheer breadth of software available for you to use, including a large number of templating languages. If you’ve come from a background of Cheetah, Tal, Stan, Myghty, Kid, Breve, or any of the other templating languages available, you can easily integrate them into your Pylons application. The integration requires two steps:
Create a template lookup object attached to the app_globals object in config/environment.py.
Create a render function, using the pylons_globals() and cached_template() functions if necessary, and use the template lookup attached to app_globals to render the template.
Use the render_mako() function and config/environment.py listings from earlier in this chapter as a basis for your own code. If you need a further example, the Pylons documentation includes an example of how to integrate Kid via a custom render() function. You can read it at http://docs.pylonshq.com/views/#custom-render-functions.
Note
Previous versions of Pylons implemented template plug-in support via the TurboGears Buffet API. This API is deprecated in Pylons 0.9.7, although you can still use the API for legacy purposes if you need. See http://docs.pylonshq.com/modules/templating/#legacy-buffet-templating-plugin-and-render-functions for more information.
Summary
This chapter was a fairly in-depth guide to the main aspects of templating in Pylons. You learned how to pass variables to templates via the template context variable c, how to avoid security problems through automatic escaping, and how to use HTML literals. You also learned the main features of Mako, from its template syntax to its inheritance chains, and you saw how to use its next and parent namespaces. You also learned all about what goes on behind the scenes to make templating in Pylons work from the Mako cache to the render() function setup.
There has clearly been a lot to take in. Don’t worry if you didn’t understand every detail on the first read. You’ll be using Mako templates throughout the book, particularly in the SimpleSite tutorial chapters, so you’ll get plenty of practice working with them to build real applications.
Next up you will learn how to create forms with Pylons, how to validate their content, and how to present error messages to the user if they enter invalid data.