Chapter 21: Deployment
Pylons is designed to be extremely flexible when it comes to deployment. The upside of this is that you will be able to deploy a Pylons application virtually anywhere—on any platform including Linux, Mac, BSD, and Windows; using any popular server including Nginx, Apache, Lighttpd, and IIS; and using most popular protocols or techniques including CGI, FastCGI, and others. The downside is that it is impossible to document all the options in one chapter.
The approach I’ll take in this chapter is to first explain the main steps in the deployment process before getting into some of the details of the different architectures that different deployment strategies rely on. Then I’ll end with two complete examples. The first explains how to use Apache to proxy to a Pylons application served by Paste and monitored by a cron job. The second is an embedded solution using mod_wsgi and Apache. Of course, I could have used any of the other available servers for the examples, but Apache is the most well known amongst open source developers.
Tip
You can find specific information about how to deploy Pylons on different servers and in different ways in the Pylons Cookbook at http://wiki.pylonshq.com/display/pylonscookbook/Deployment.
Setting up and deploying a Pylons application involves the following steps:
Choosing or setting up a Python environment
Installing the required software into the environment
Creating a config file for the application
Setting up the application instance
Serving the application from the installed environment
Let’s look at each in turn.
Choosing or Setting Up a Python Environment
Throughout the book so far, I have recommended using a virtual Python environment to isolate the software libraries your particular Pylons application will use from other Python software on the system while developing your Pylons application.
Using a virtual environment is an extremely good way to deploy a Pylons application in a production environment too, but there are alternatives, and it is worth being aware of them.
Using the System Python Environment
The most obvious option is to install your Pylons applications into the system Python environment. If you want to have only one Pylons application running on the server, this is a great option. Because there is only one Python environment, you avoid the need to worry about setting up the appropriate paths, and you can be sure your Pylons application is always using the same libraries as every other Python application on your system.
The disadvantages are that you need to have root access to install libraries and that any changes to the system Python environment (such as platform security updates or another user upgrading software) will also affect your Pylons application.
Platform Packages or Easy Install?
If you do decide to use the system Python environment, you are faced with another choice. Should you use the versions of libraries packaged for your operating system or install them manually? As an example, Pylons itself is available as a .deb file for Debian-based systems such as Ubuntu Hardy Heron, which was used to generate the screenshots in this book. This means it can be installed to the system Python environment with apt-get install python-pylons. By installing Pylons in this way, you get certain benefits:
Confidence that the software will be installed correctly for your platform
Automatic installation of the dependencies
The ability to easily uninstall
An assurance from the particular platform package maintainer that if a security flaw is found, an updated package will provided
Binary versions of any dependencies with C or C++ extensions so that no compilation is required
The big disadvantage is this:
Your platform probably has a much slower release cycle than the packages your Pylons applications depend on, so it is likely most of the software available is out-of-date. For example, Hardy Heron uses Pylons 0.9.6.1, whereas this book already covers Pylons 0.9.7
For this reason, it is usually better to install software to the system Python installation using Easy Install and get the latest version of the software on which your application depends. If you need to use Easy Install, you are probably much better off also using a virtual Python environment anyway so that you can keep complete control over the software your application needs. This is why for the vast majority of cases you should use a virtual Python environment.
Using Buildout
The virtualenv.py tool for setting up a virtual Python environment isn’t the only way to set up an isolated Python sandbox. Another option is to use Buildout.
Buildout does a number of things:
Creates a sandbox for your application
Provides various recipes for managing common deployment tasks
Manages the eggs your application depends on
Buildout is interesting because it provides more than just an isolated Python environment. In fact, it also replaces Easy Install, so you can’t easily use Buildout and Easy Install together.
Buildout comes from the Zope world and can be used for setting up any sort of environment via plug-ins called recipes. This means Buildout can compile and install Apache, fetch your Python dependencies, run a test suite, and start your application running. Buildout can also cache the eggs it downloads, which can be handy if multiple applications share the same eggs or if you want to provide some resilience against a particular egg dependency not being available the next time you try to install your Pylons application.
The drawback of Buildout from a Pylons user perspective is that you already know how to do all the things Buildout does but in other ways. For example, you can already isolate your Python environment using a virtual Python environment, you can already install dependant packages using Easy Install, and you can easily write your own shell scripts or Python programs to handle more complex deployment or testing requirements. You can even download the required eggs to a cache. Just use this command:
$ easy_install -zmaxd . "SimpleSite==0.3.0"
This will connect to the Internet and download SimpleSite and all of its dependencies to the current directory, without installing anything. The -a option used here is short for --always-copy, but this command does not copy eggs that are created in development mode (ones that have tag_build=true set in the setup.cfg file), so you’ll still need to manually download any development eggs your application requires.
If you are willing to invest some time learning Buildout and the recipes it uses, you’ll find it works well, but since most Pylons developers use a virtual Python environment, you might find Pylons-oriented Buildout documentation a bit thin on the ground. Having said that, you can always read the main Buildout documentation at http://pypi.python.org/pypi/zc.buildout/1.1.1.
Setting Up a Virtual Python Environment
Although using the system Python environment has its benefits and Buildout is a useful tool, I’ll assume you have decided to create a virtual Python environment. When deploying an application, it is also usually a good idea to create a user for the application. In this chapter, you’ll deploy the SimpleSite application you’ve been developing, so I’ll assume you’ve created a user called simplesite with a home directory in /home/simplesite. To set up a virtual Python environment from scratch in an env directory in the simplesite user’s home directory, you would use the following commands as the simplesite user. I like to keep any files I download in a directory called download, so you’ll save the virtualenv-1.1.tar.gz file there:
$ mkdir /home/simplesite/download
$ cd /home/simplesite/download
$ wget http://pypi.python.org/packages/source/v/virtualenv/virtualenv-1.1.tar.gz
$ tar zxfv virtualenv-1.1.tar.gz
$ cp virtualenv-1.1/virtualenv.py ./
You can now remove the old files if you like:
$ rm -r virtualenv-1.1
Now create the virtual Python environment, ignoring packages installed in the system Python:
$ cd /home/simplesite/
$ python2.5 download/virtualenv.py --no-site-packages env
The virtual Python environment is now in /home/simplesite/env.
Tip
You should always check the virtual Python page on the Python Package Index to see whether there is a more recent release. In particular, virtualenv 1.1 doesn’t support Python 2.6 properly, so if you want to use Python 2.6, keep a lookout for a more recent version.
Dealing with Activate
You’ll recall from Chapter 2 that one way of using a virtual Python environment is to use the activate script (or activate.bat on Windows) to automatically modify the PATH environment variables in the shell you are working in. This setup means the commands you type such as paster, python, and easy_install will result in the virtual Python environment copies being executed rather than the system Python environment’s versions. If you are used to working in an activated virtual Python environment like this, it is easy to forget that the scripts in the virtual Python environment’s bin directory can be executed equally well outside the activated shell just by specifying their full paths.
For example, if you had set up a virtual Python environment in /home/simplesite/env, the following commands would work perfectly well from anywhere:
$ /home/simplesite/env/bin/python
$ /home/simplesite/env/bin/easy_install "SimpleSite==0.3.0"
When you are deploying an application, you frequently need to run the previous scripts and programs from cron jobs, CGI scripts, or other locations. In such situations, rather than trying to run activate first or modify the PATH, just specify the full path to the executable you are trying to execute, and everything will work as easily as it would if you were running commands from the system Python’s installation.
Installing the Required Software into the Environment
Now that you have a fresh, clean virtual Python environment, you need to install the software you want to deploy into it. You can do this in a number of ways that you have already been using throughout the book:
$ /home/simplesite/env/bin/easy_install "SimpleSite==0.3.0"
$ /home/simplesite/env/bin/easy_install SimpleSite-0.3.0-py2.5.egg -f /path/to/eggs
$ cd /path/to/SimpleSite; ~/env/bin/python setup.py develop
In the first example, the SimpleSite egg and all its dependencies would be fetched and installed from the Python Package Index (or any of the links you specified as metadata in the setup.py file, as you learned in Chapter 19). The second example demonstrates how to install a specific egg that you have created yourself. Once again, the dependencies will be matched from the Python Package Index, the links in the egg’s setup.py file, or, this time, the eggs in the /path/to/eggs directory. The second approach is useful if your project uses some custom modules that aren’t publicly distributed. The final example demonstrates how to set up the source code in develop mode, as you have done throughout most of the book. Once again, the dependencies will be matched from the Python Package Index or any of the links in the project’s setup.py file.
Which method you choose is entirely up to you, but bear in mind that for a production deployment you probably want to be absolutely sure of the version you are using, so you will probably want to use one of the first two methods. If you were to use the third method, you might be tempted to modify the code in the SimpleSite directory in the event of a problem when really you should fix the problem, change the version number, make a release, and deploy the new version to the virtual Python environment.
Creating a Config File for the Application
Once the application and all its dependencies are installed, you’ll need to create a config file for your application. Ideally, you will have designed your application in such a way that any configuration that needs to be done to deploy the application happens in the config file. The user shouldn’t have to edit any Python code within your application since it is now packaged up into the egg and not easily accessible.
You’ll remember from the “Customizing the Production Config File Template” section of Chapter 19 that Pylons has a tool to automatically generate a config file for an application from the deployment.ini_tmpl template in the project’s config directory. That tool is the paster make-config command.
Create a skeleton config file for your application instance called production.ini:
$ /home/simplesite/env/bin/paster make-config "SimpleSite==0.3.0" production.ini
Once the production.ini file is created, you can customize it for your particular deployment. In particular, you’ll want to ensure the debug option in [app:main] is set to false. You should also customize the secret for the AuthKit cookie, specify an appropriate DSN in the sqlalchemy_url, and change any other options you need to configure such as the error-reporting options.
One thing to bear in mind is that with the debug option set to false and the error reporting configured correctly, Pylons will e-mail an error report for every request during which an error occurs. If you have a very busy site and a serious problem occurs, your e-mail address could be swamped by e-mails. If you choose an address you don’t check very often, you might miss important error reports, so choose an appropriate e-mail address, but be aware of the risks.
Tip
The paster make-config command doesn’t actually require the software you are creating a config file for to be installed. As long as a recent version of Paste is installed, the command will automatically install all the software you require from the Python Package Index before creating the config file.
Setting Up the Application Instance
Once you have installed the Pylons application and created a config file with the paster make-app command, you can set up the configured application. You’ve seen how to do this quite a few times now. You simply run the following command, specifying the config file you want to set up, which in this case is production.ini:
$ /home/simplesite/env/bin/paster setup-app production.ini
This will run the code in the application’s websetup.py file using the configuration options you’ve specified in the config file. In this case, it will set up all the tables and data you need for an empty website in the database specified by the sqlalchemy_url configuration option. You can then access the Pylons interactive shell with this command:
$ /home/simplesite/env/bin/paster --plugin=pylons shell production.ini
Serving the Application from the Installed Environment
Once the application and all its dependencies are installed into the environment and the application has been set up, you are ready to serve the application.
Once again, there are many options for how to serve your application. Because a configured Pylons application is also a WSGI application, Pylons applications will run on any WSGI server, as you learned in Chapter 16.
Deploying a Pylons application involves obtaining a WSGI application based on the configuration in the config file. You learned how to do this manually with the Paste Deploy loadapp() function in Chapter 17.
Rather than discuss all the options here, I’ll first show how to choose a deployment option and then show two examples of different techniques for deploying a Pylons application via Apache—one as an example of embedding a Pylons application with mod_wsgi and the other an example of using the Paste HTTP server proxied to by an Apache web server and monitored with a simple cron script.
As a test, though, you can run your application using the Paste HTTP server you are used to using for serving development instances of your application:
$ /home/simplesite/env/bin/paster serve production.ini
Notice that you didn’t use the --reload option this time.
Caution!
As was explained in Chapter 4, it is important that you remember to disable the interactive debugger for production deployment. If it is enabled and an error occurs, the visitor will be presented with the same debugging interface you have used and may be able to cause serious harm to your application by doing things such as deleting files, changing data in your database, or worse.
Deployment Options
Pylons applications are designed to be run in a multithreaded environment. This means they are loaded into memory once when the server is started, and on each request a new thread is started. Simply put, threading allows the same code to be executed in parallel to handle different requests, with each thread in turn getting a portion of the CPU time until it has finished executing.
The advantage of the threaded approach is clear. Since most requests take at least a few milliseconds, there is no point in waiting for one request to finish before starting the next because most of the time the Pylons application will be waiting for data, either from the network, the filesystem, the database, or elsewhere; so, handling multiple requests at the same time using threads is much more efficient because while one thread is waiting for network or database information, the others can be performing useful processing. Handling multiple threads at once in this way is called multithreading.
An alternative approach is to have multiple Pylons applications running at once as different processes and then pass each new request to one of the running Pylons processes. This approach is called a multiprocess approach. Although this takes a lot more memory (since you are running more copies of Pylons), it is arguably more reliable because if one Pylons application has a serious crash, the others will still be available to serve requests. In a multithreaded environment, if one Pylons application were to crash badly, no more requests could be served. Luckily, Pylons is designed to handle problems within individual threads so is highly unlikely to fail in such a way as to prevent other threads from serving requests; therefore, most people stick with a multithreaded environment.
One drawback of the multiprocess approach is that you can’t directly share information between requests. For example, if your application used the counter example from Chapter 3 where the number of requests was stored in the app_globals object and you were to run the application as two separate processes, each would have their own counter. You can’t share data via the app_globals object in a multiprocess environment, but you can in a multithreaded environment.
Of course, nothing is stopping you from setting up multiple Pylons processes, each of which can handle multiple threads, as long as you haven’t written any complex code that relies on information in the Pylons app_globals object being available.
You could also deploy your Pylons application as a CGI script using the run_with_cgi() example you saw in Chapter 16. As was mentioned in that chapter, though, doing so is very inefficient because handling each request would involve loading the entire app into memory including Python itself and all the required libraries, setting up the middleware stack, handling the one request, and then unloading everything again. For this reason, deploying a Pylons application as a CGI script is not recommended.
It is also possible to run Pylons on an asynchronous server, although I’ve never done so. In practice, this would offer few advantages over multithreading because Pylons itself is not set up for asynchronous use.
The different ways of getting a Pylons application integrated into another server broadly fall into two camps: embedding and proxying.
Embedding
By using a tool such as mod_wsgi or mod_python, you can directly embed a Python interpreter running your Pylons application into the server. If you are used to a particular server architecture, this can be very useful because the Pylons application effectively becomes part of the server itself. The drawback of this approach is that it can be difficult to debug problems because it isn’t always clear whether the problem is with a Pylons application, the server setup, or the way the WSGI adaptor is working.
To embed the Pylons application into a server, you usually need to gain access to the actual WSGI object. You can do so like this:
#!/home/simplesite/env/bin/python

from paste.deploy import loadapp
wsgi_app = loadapp('config:/home/simplesite/production.ini')
Because you aren’t serving the application directly, you don’t need to specify any settings in the [server:main] section of the config file because servers other than the Paste HTTP server don’t currently understand them. Instead, you would configure settings such as the port and the host in your server’s configuration.
Another issue when embedding a Pylons application into another server is that you have to ensure that the Python interpreter that serves the application has access to all the libraries in your virtual Python environment. How this is configured would depend on your server. Later in the chapter you’ll look at the specific case of using mod_wsgi to embed a Pylons application in Apache.
Proxying
An alternative approach is to serve the Pylons application with a Python server such as the Paste HTTP server and then proxy requests from your main server to the server running the Pylons application. Paste supports a variety of protocols including HTTP and FastCGI, and has a range of threading options. The advantage of this approach is that you have complete control over your Pylons application but get the added security of using a more security-hardened server such as Apache for the Internet-facing side of the setup.
To set this up, you simply specify the settings you want to use in the [server:main] section of the config file and start the paster server as usual with the paster serve command, making sure to use the paster script from the virtual environment you want to serve the application from. You would ordinarily also change the port to one that was not already in use, such as 8080.
You would then configure the main server to proxy requests from port 80 on the public-facing Internet to port 8080 on the local machine where the Paste HTTP server will handle the request. You’ll see how to do this with Apache later in the chapter, although you can also easily use Lighttpd or Nginx, both of which are good choices.
Using Apache to Proxy Requests to Pylons
Let’s start by looking at a proxying setup. This is a very good way of setting up a Pylons application because it puts you in complete control of the process.
First you’ll need to install Apache 2, mod_proxy, and mod_proxy_http. Most platforms will automatically have mod_proxy and mod_proxy_http with the standard Apache installation, but you may need to enable them:
$ sudo a2enmod proxy
$ sudo a2enmod proxy_http
Once Apache is installed, you can add a new virtual host. A suitable configuration for the SimpleSite application you’ve been developing might look like this:
<VirtualHost *>
    ServerName www.pylonsbook.com
    ServerAlias pylonsbook.com

    # Logfiles
    ErrorLog  /home/simplesite/log/error.log
    CustomLog /home/simplesite/log/access.log combined

    # Proxy
    ProxyPass / http://localhost:8080/ retry=5
    ProxyPassReverse / http://localhost:8080/
    ProxyPreserveHost On
    <Proxy *>
        Order deny,allow
        Allow from all
    </Proxy>
</VirtualHost>
You’ll need to replace pylonsbook.com with the domain name that will host your Pylons project, create the directory you would like the error logs to be held in, and then save the config file as /etc/apache2/sites-available/simplesite or in the equivalent location for your platform.
The ProxyPass directive tells Apache to forward any requests that have a URL starting with / (that is, all requests) to a server running on port 8080 on the local machine. Notice that you’ve set the retry timeout to 5 seconds so that Apache tries to connect every 5 seconds if the Pylons application is restarted rather than the default of 60 seconds.
Tip
Retry timeout customization is particularly useful because the default is 60 seconds, which means that Apache will show an error page for 60 seconds if any connection to the Paste HTTP server failed, including when you restart the server. This issue is easily avoided by setting the retry option to a smaller number, but you can do this only on versions of Apache newer than 2.2.
Next, you need to start the Pylons application. Apache is set up to proxy to a server on port 8080, so check that the production.ini config file sets the port to 8080 in the [server:main] section and that the debug setting is false.
Because you want the Pylons server to remain running after you have exited from the shell you started it in, you use a slightly different version of the paster serve command, which looks like this:
$ /home/simplesite/env/bin/paster serve --daemon production.ini start
You’ll see the message Entering daemon mode, and then you’ll be returned to the shell.
Tip
Daemon mode isn’t supported on Windows, but instead you can run your Pylons application as a Windows service. The “Deployment on Windows” section later in the chapter contains a link that will show you how.
Now that the Pylons application is running in production mode, you are ready to enable the virtual host in Apache, disable the default configuration and enable simplesite:
$ sudo a2dissite default
$ sudo a2ensite simplesite
You will need to restart Apache for the changes to take effect:
$ sudo /etc/init.d/apache2 restart
Now you are ready to test your application. Make sure you have created the log directory and then if you visit the external domain for your application, http://pylonsbook.com in the example, you should see your application running. If not, check the Apache error logs and check that the paster server is actually running by visiting the application running on port 8080; in our example, this would be http://pylonsbook.com:8080 but on your local machine this would be http://localhost:8080. If the application doesn’t appear on port 8080 either, check that you have set the correct port in your production.ini file, and check that you are serving the production.ini file and not a different file by mistake. Finally, you can check the paster server is running with the following command, which lists all running processes on your system and then displays only those with paster somewhere in the results:
$ ps aux | grep paster
Once the application is running correctly, you should consider setting up a firewall so that the Paste HTTP server cannot be accessed directly on the Internet on port 8080 because your application expects to have requests proxied from port 80.
Although the example here uses only one Paste HTTP server, you could also set up a whole range of them, each running on different ports. You can then set up Apache to proxy different requests to different servers so that the load can be shared between the different processes. If you are running on a multicode processor, this is one way to ensure all the cores are used effectively.
Setting Up Log Files
For running a Pylons application in a production environment, you might also want the paster serve script to log error messages. You can specify a file to log to using the --log-file option. You might also want to store the process ID of the running server in a file so that other tools know which server is running; this is done with the --pid-file option. Here’s what the full command might look like:
$ /home/simplesite/env/bin/paster serve --daemon --pid-file=/home/simplesite/simplesite.pid --log-file=/home/simplesite/log/paster-simplesite.log production.ini start
As well as specifying start, you can use a similar command with stop or restart to stop or restart the running daemon, respectively.
Of course, as well as relying on the Apache and Paste HTTP server logs, you can also use any of the techniques you learned about in Chapter 20 to set up application logs to log messages to files in the log directory.
Creating init Scripts
Now that the Pylons application is successfully running, you might want to add a script to ensure the Pylons application is correctly started and stopped when the server is turned on, rebooted, or shut down. Here’s a simple script named simplesite to achieve this:
#!/bin/sh -e

cd /home/simplesite/
case "$1" in
  start)
    /home/simplesite/env/bin/paster serve --daemon --pid-file=/home/simplesite/simplesite.pid --log-file=/home/simplesite/simplesite.log /home/simplesite/production.ini start
    ;;
  stop)
    /home/simplesite/env/bin/paster serve --daemon --pid-file=/home/simplesite/simplesite.pid --log-file=/home/simplesite/simplesite.log /home/simplesite/production.ini stop
    ;;
  restart)
    /home/simplesite/env/bin/paster serve --daemon --pid-file=/home/simplesite/simplesite.pid --log-file=/home/simplesite/simplesite.log /home/simplesite/production.ini restart
    ;;
  force-reload)
    /home/simplesite/env/bin/paster serve --daemon --pid-file=/home/simplesite/simplesite.pid --log-file=/home/simplesite/simplesite.log /home/simplesite/production.ini restart
    /etc/init.d/apache2 restart
    ;;
  *)
    echo $"Usage: $0 {start|stop|restart|force-reload}"
    exit 1
esac

exit 0
Notice that the force-reload option also restarts Apache. The way you would install this script varies from platform to platform. On Debian-based systems, you would install it like this:
$ sudo cp simplesite /etc/init.d/simplesite
$ sudo chmod o+x /etc/init.d/simplesite
$ sudo /usr/sbin/update-rc.d -f simplesite defaults
 Adding system startup for /etc/init.d/simplesite ...
   /etc/rc0.d/K20simplesite -> ../init.d/simplesite
   /etc/rc1.d/K20simplesite -> ../init.d/simplesite
   /etc/rc6.d/K20simplesite -> ../init.d/simplesite
   /etc/rc2.d/S20simplesite -> ../init.d/simplesite
   /etc/rc3.d/S20simplesite -> ../init.d/simplesite
   /etc/rc4.d/S20simplesite -> ../init.d/simplesite
   /etc/rc5.d/S20simplesite -> ../init.d/simplesite
This adds the simplesite script to the different run levels so that it will be started automatically when the system starts.
You can now start, restart, and stop the Pylons application with the following commands:
$ sudo /etc/init.d/simplesite start
$ sudo /etc/init.d/simplesite restart
$ sudo /etc/init.d/simplesite stop
Restarting Stopped Applications
If for any reason the Paste HTTP server daemon running your Pylons application should unexpectedly die (not that it ever should), you will want a way to restart it. Many tools are available to monitor and restart processes including daemontools (http://cr.yp.to/daemontools.html) and Supervisor (http://supervisord.org/). These are documented in the Pylons Cookbook.
For many situations, the simplest approach is simply to use a cron job to attempt to start the Paste HTTP server daemon every couple of minutes. If it is already running, the request is ignored; otherwise, the server is started. Edit the root crontab like this:
$ sudo crontab -e
Then add this line to check every two minutes:
# m h  dom mon dow   command
*/2 * * * * /etc/init.d/simplesite start
Although this isn’t the most elegant approach, it does work surprisingly well and is a lot less hassle to set up than more advanced monitoring tools. Of course, for more sophisticated setups, a more sophisticated monitoring and restart strategy is required.
Embedding Pylons in Apache with mod_wsgi
Now that you’ve seen an example of how to proxy to the Paste HTTP server to run a Pylons application, I’ll show you an example of a different approach. In this section, you’ll embed the Pylons application directly into Apache with mod_wsgi, which is well documented at http://code.google.com/p/modwsgi/. There is also a user group at http://groups.google.com/group/modwsgi if you have any problems.
Since mod_wsgi is relatively new, not all platforms will have a binary package that can be easily installed, so in this section you’ll learn how to compile it from scratch. The mod_wsgi package can be compiled for and used with either Apache 1.3, 2.0, or 2.2 on Unix systems (including Linux), as well as with Windows. Either the single-threaded prefork or multithreaded worker Apache MPMs can be used when running on Unix and Linux; in this section, you’ll use the worker MPM. If you are using Windows, you can skip the compilation steps and download the appropriate binary for your version of Python from http://code.google.com/p/modwsgi/wiki/InstallationOnWindows.
First make sure you have all the required packages. On Ubuntu Hardy Heron you will need at least the following:
$ sudo apt-get install build-essential python2.5-dev
$ sudo apt-get install apache2 apache2-mpm-worker apache2-utils apache2-threaded-dev
Whichever way you’ve installed Apache, check it has the worker. You'll see worker.c in the output (line 6 below):
- ::
- linenothreshold
5
$ apache2 -l
Compiled in modules:
  core.c
  mod_log_config.c
  mod_logio.c
  worker.c
  http_core.c
  mod_so.c
- ::
- linenothreshold
5000
You are now ready to download and build mod_wsgi. At the time of writing, the latest version is 2.3, which you can download and build on Unix-based systems like this. Here I’m using Python 2.5, but you can create a version for a different version of Python if you prefer:
$ wget http://modwsgi.googlecode.com/files/mod_wsgi-2.3.tar.gz
$ tar zxfv mod_wsgi-2.3.tar.gz
$ cd mod_wsgi-2.3
$ ./configure --with-python=/usr/bin/python2.5
$ make
Check that it can share the Python library by looking for libpython2.5.so in the output from the following commands:
$ cd .libs
$ ldd mod_wsgi.so | grep python2.5
    libpython2.5.so.1.0 => /usr/lib/libpython2.5.so.1.0 (0x00002b081a2e1000)
You can then install it:
$ cd ../
$ sudo make install
With mod_wsgi installed, you’ll need to enable it so that Apache can use it. Create an /etc/apache2/mods-available/wsgi.load file with the following content:
LoadModule wsgi_module /usr/lib/apache2/modules/mod_wsgi.so
Now enable the mod_wsgi module:
$ sudo a2enmod wsgi
At this point, mod_wsgi is installed. To make debugging Apache easier, it is useful to set the log level to info so that you get all the mod_wsgi information. You do this by adding the following line to Apache’s httpd.conf:
LogLevel info
You’ll need to restart Apache:
$ sudo /etc/init.d/apache2 restart
Check the error logs to ensure mod_wsgi has loaded:
$ cat /var/log/apache2/error.log | grep wsgi
Then when you restart, you see the following:
[Sun Jun 29 04:54:44 2008] [info] mod_wsgi: Initializing Python.
[Sun Jun 29 04:54:44 2008] [info] mod_wsgi (pid=4237): Attach interpreter ''.
[Sun Jun 29 04:54:44 2008] [info] mod_wsgi (pid=4239): Attach interpreter ''.
[Sun Jun 29 04:54:44 2008] [notice] Apache/2.2.8 (Ubuntu) mod_wsgi/2.3 Python/2.5.2 configured -- resuming normal operations
Setting Up a Virtual Host
Now that mod_wsgi is installed, you’ll need to create a virtual host. Create a new file called /etc/apache2/sites-available/simplesite_mod_wsgi with the following content:
<VirtualHost *>
    ServerName www.pylonsbook.com
    ServerAlias pylonsbook.com

    # Logfiles
    ErrorLog  /home/simplesite/log/error.log
    CustomLog /home/simplesite/log/access.log combined

    # Setup mod_wsgi
    WSGIScriptAlias / /home/simplesite/mod_wsgi/dispatch.wsgi

    <Directory /home/simplesite/mod_wsgi>
    Order deny,allow
    Allow from all
    </Directory>

</VirtualHost>
Once again, you’ll need to replace pylonsbook.com with the domain name that will host your Pylons project. In the example, you are using the same log directory as for the proxy example, but you can change that if you want.
The WSGIScriptAlias directive tells mod_wsgi that all requests to the root of your application should be handled by the /home/simplesite/mod_wsgi/dispatch.wsgi script. Create the /home/simplesite/mod_wsgi directory, and add the dispatch.wsgi file with the following content:
# Add the virtual Python environment site-packages directory to the path
import site
site.addsitedir('/home/simplesite/env/lib/python2.5/site-packages')

# Avoid ``[Errno 13] Permission denied: '/var/www/.python-eggs'`` messages
import os
os.environ['PYTHON_EGG_CACHE'] = '/home/simplesite/egg-cache'

# Load the Pylons application
from paste.deploy import loadapp
application = loadapp('config:/home/simplesite/production.ini')
Note
If you are using the Pylons WSGIErrorsHandler, log messages sent after the environment is set up should end up in the Apache error log. Otherwise you can add these two lines to the top of your dispatch.wsgi file to force logging to work:
from paste.script.util.logging_config import fileConfig
fileConfig('/home/simplesite/production.ini')
A few things are going on in the dispatch.wsgi script. The virtual Python environment’s site-packages directory is added to the Pylons path so that mod_wsgi can find all the libraries you need. You used site.addsitedir() rather than the more usual sys.path.append() so that eggs listed in the .pth files set up by Easy Install are also added to the path.
Your Pylons application will actually be run as the Apache user, and occasionally mod_wsgi will need to unpack some of the eggs your Pylons application uses. The location it should unpack them to can be customized by setting the PYTHON_EGG_CACHE environment variable, which you first saw in Chapter 2. In this case, the example uses the directory /home/simplesite/egg-cache, so you should create that directory and ensure that the Apache user has permission to read and write to it. If you see a pkg_resources.ExtractionError, which starts with “Can't extract file(s) to egg cache”, it means that you haven't specified your egg cache directory correctly or that Apache doesn't have the appropriate permissions to that directory. Apache will also need access to your data directory. The easiest way of setting up the appropriate permissions is to add the Apache user to the simplesite group and then grant group write permission to the egg-cache and data directories so that Apache can write to them. On Ubuntu Hardy you do so like this:
$ sudo usermod -a -G simplesite www-data
$ mkdir /home/simplesite/egg-cache
$ chmod g+w /home/simplesite/egg-cache
$ chmod g+w /home/simplesite/data
Most developers would choose MySQL or PostgreSQL for a production system but if you are using SQLite as a database bear in mind that mod_wsgi will require write access to the directory containing the database. This means you will have to create a new directory for SQLite, give the Apache user access to it and modify the path in the production.ini file.
The final part of the dispatch.wsgi script uses Paste Deploy to load the Pylons WSGI application object from the config file in the way you learned about in Chapter 17. mod_wsgi knows to look for an object called application in the dispatch script, and it uses this (the Pylons application) to serve the requests.
Now that the virtual host configuration is in place and you’ve written dispatch.wsgi, you can test the application. First you’ll need to enable the virtual host:
$ sudo a2dissite simplesite
$ sudo a2ensite simplesite_mod_wsgi
Then you will need to restart Apache for the changes to take effect:
$ sudo /etc/init.d/apache2 restart
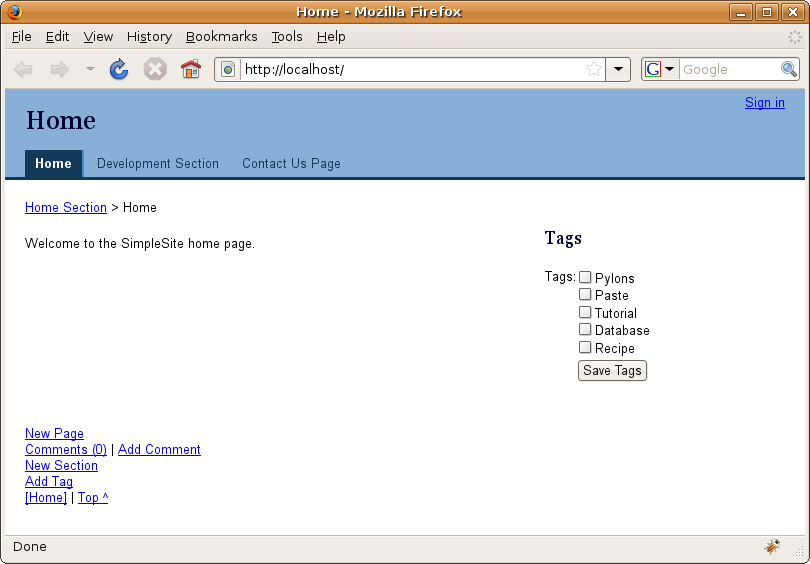
If you visit your web site, you should now see the finished SimpleSite application being correctly served by mod_wsgi, as shown in Figure 21-1.
Troubleshooting
If you have problems with mod_wsgi, the first thing you should do is look at the error logs in both the /home/simplesite/log directory and the main Apache error log. Messages from mod_wsgi should be logged. If the problem isn’t obvious, try replacing the dispatch.wsgi script with this test script, and make sure it works properly:
def application(environ, start_response):
    status = '200 OK'
    output = 'Hello World!'

    response_headers = [('Content-type', 'text/plain'),
                        ('Content-Length', str(len(output)))]
    start_response(status, response_headers)

    return [output]
You will need to restart Apache any time you make a change to any code or to the production.ini or dispatch.wsgi files. This is because once an application is loaded into memory, mod_wsgi uses the same application to serve each request so you need to force Apache to recreate the application before your changes will take effect. If you replace the dispatch.wsgi file, restart Apache and visit the site, you should be greeted with “Hello World!” Once this works correctly, you can try with Pylons once again.
One thing that often catches people out when using mod_wsgi with Pylons is that the Pylons interactive debugger cannot always be used with mod_wsgi. If you try to use it in a multiprocess setup, you will get an error like this:
AssertionError: The EvalException middleware is not usable in a multi-process environment
You should set the debug option to false to disable the interactive debugger, and then your Pylons application will work. If you really need to use the interactive debugger the mod_wsgi documentation at http://code.google.com/p/modwsgi/wiki/DebuggingTechniques explains how you can configure Apache to enable its use by setting the StartServers and ServerLimit options.
If you still have problems, you should read the detailed documentation on the http:// code.google.com/p/modwsgi/ site or ask a question on the mailing list.
Deployment on Windows
Pylons can also be deployed on Windows systems. The easiest approach is simply to use the Windows ports of all the software you would usually use with Pylons under Linux. For example, Apache, MySQL, and PostgreSQL all have good-quality versions available for the Windows platform. Pylons and its dependencies run equally well on Windows as on other platforms as long as you use Python 2.4 or newer.
If you want to do things in a more Windows-specific way, you can use one of two approaches that Pylons users have used in the past. The first involves setting up the Paste HTTP server as a Windows service. This is documented in the Pylons Cookbook at http://wiki.pylonshq.com/display/pylonscookbook/How+to+run+Pylons+as+a+Windows+service. You will need to install pywin32 from https://sourceforge.net/projects/pywin32/ to use this approach.
The second approach is to serve a Pylons application from IIS, and although this is significantly more complicated, the process is fully documented at http://wiki.pylonshq.com/display/pylonscookbook/Serving+a+Pylons+app+with+IIS.
A final approach is a bit of a compromise, but if you are installing Pylons on a Windows machine purely because your company’s infrastructure is Windows-based, you could consider using a virtualization technology such as VMware to run an entire Linux instance on a Windows server.
Summary
You should now have a solid understanding of how to deploy your Pylons applications. With the information you have gathered throughout this entire book, you should now be ready to design, develop, and deploy your own Pylon applications! I hope you've found this book to be useful guide to web development with Pylons. I'd encourage you to get involved in the Pylons community by contributing to the discussions on the mailing list or on IRC or by writing new articles for the Pylons cookbook. Whatever you intend to use Pylons for, whether it is a simple site like the one developed in the book or a popular service like http://reddit.com, I wish you all the very best in your endeavors.