Can I Turn It On? - A Practical Introduction to Arduino and Dynamic Demand
| Posted: | 2009-04-30 18:24 |
|---|---|
| Tags: | Hardware, Carbon |
Contents
Background
At Oxford Geek Night 10, Tom Dyson presented a microslot describing his http://caniturniton.com website. His site exposes data about the frequency of the National Grid. As you probably know, in the UK the frequency of electricity is about 50 Hz AC but when the grid is struggling to keep up with demand the frequency actually drops just below 50Hz and when there is excess power the frequency rises just above 50Hz. Of course the people running the National Grid alter the supply to try to meet the demand but they often end up producing more power than is needed to avoid blackouts. Tom's Geek Night presentation shows some typical demand graphs at http://www.slideshare.net/tomdyson/dynamic-demand-presentation.
If we only turn on electronic devices when there is excess power in the grid, we can avoid contributing to peaks in demand and help smooth out small fluctuations in the the demand curve which in turn means the people running the National Grid won't need to over-estimate the power required quite so much which in turn would cut down on the amount of CO2 we produce in the UK.
Interstingly, it is the coal-fired power stations which are used to meat peaks in demand and these are the worst contributors to CO2 production which is another reason to try to avoid contributing to a peak.
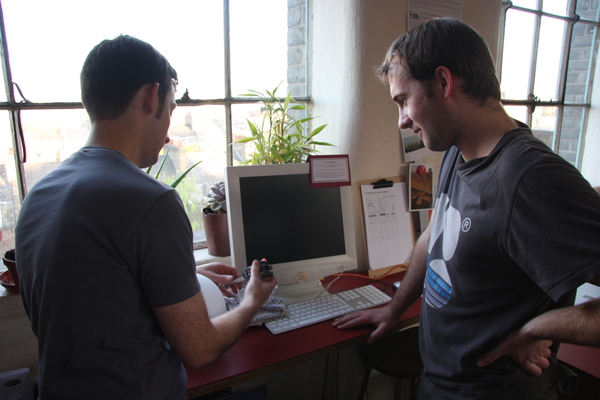
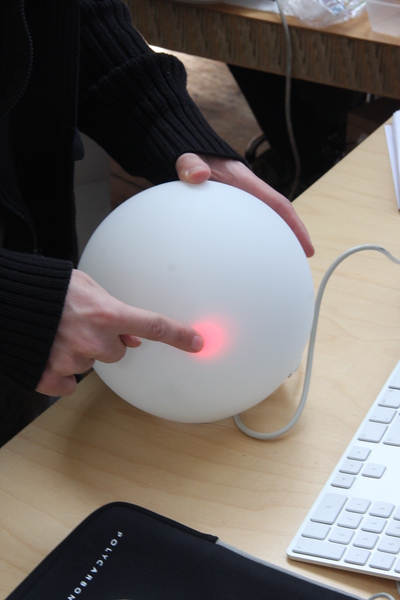
At the Geek Night Tom challenged members of the audience to create a hardware Arduino device to use his feed. As it happens I share an office with Chris Adams in Hub Islington and he is also very interested in the area of dynamic demand and personal carbon foortprinting so in late February and early April this year we worked on and off on a device, aptly named the tea light! It is simply an Arduino device with an Ethernet shield which regularly contacts the caniturniton.com website and shows a green light if it is safe to make tea and a red light if it isn't!
Here it is in action next to the kitchen in the Hub Islington.
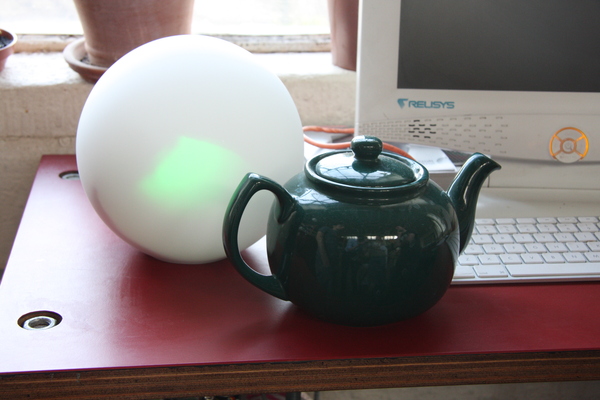
Chris has written a detailed overview of the tea light and explains why boiling the problem down (excuse the pun) to whether or not it is safe to make tea is a useful thing to do. Now would be a good time to read his post about the arduino dynamic demand tea light. Once you are done come back here and learn how to build your own.
What You'll Need
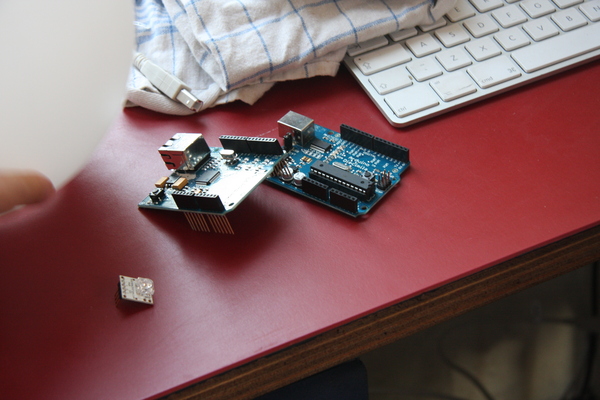
To build your own tea light you'll need a few pieces of relatively inexpensive hardware which will end up looking like this:
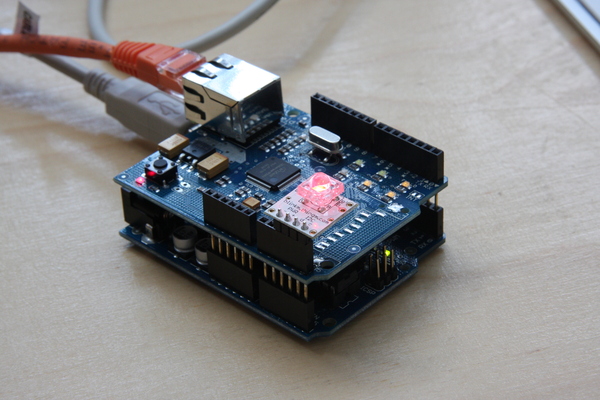
Here you can see the Arduino board at the bottom, with an Ethernet Shield on top of it and a BlinkM LED plugged in on top. We weren't able to make tea at the time the photo was taken.
An Arduino Board
If you haven't heard of Arduino yet, it is a simple hardware board with a microprocessor and some 5V inputs and outputs. It is designed to be very easy for people who are just getting into hardware programming to get started with becuase it comes with software that handles most of the complexity for you. Getting the Arduino to flash lights, connect to the internet, control speakers and the like is usually just a case of tweaking the existing example programs with snippits from the internet and clicking the "Upload to Board" button. This lego-like flexibility makes it an ideal basis for a tea-light.
The Arduino website is at http://www.arduino.cc/ and there are a few different versions of the board available. Any of them should work but if you want to follow us exactly we used a Diecimila board. Here is a list of Arduino suppliers. In the UK, you can buy them from Tinker.IT (I met Peter Knight from Tinkier.IT at the first London Hackspace meetup in Islington at the Regent pub on March 17th). Arduinos cost about 30 pounds.
An Ethernet Shield
The Ethernet shield is a special component which fits on top of the Ardiuno to give it ethernet capabilities to be able to talk to the Can I Turn It On? website. The Ethernet software is part the the Arduino IDE so you just plug it in and get going. Again they cost about 30 pounds.
A BlinkM LED
We use a special LED which can display any colour called a BlinkM but you could just as easily use separate red and green LEDs. You can buy them from http://www.sparkfun.com/commerce/product_info.php?products_id=8579. You might even want the super powerful version because the tea light can be a little tricky to spot in string sunlight otherwise.
A USB Cable
You'll need a USB cable of the type you would use to connect a computer to a scanner or printer. These have the square shaped USB plug one end and the flat shaped one the other. This is used to connect the Arduino to a computer and to provide it with power.
Cat 5 Cable
You'll need a length of ethernet cable to connect the tea-light to the internet
Lamp Shade
For purely asthetic reasons you can place the tea-light in a lamp shade if you wish. Make sure the shade is fairly transparent because the light isn't terribly bright (you wouldn't want to waste too much energy on lighting now would you) and make sure it is big enough to fit the Arduino inside.
Assembling the Hardware
Assembling the hardware is no harder than assembling Lego. Just plug the Ethernet sheild into the Arduino board. The BlinkM has to be plugged in so that the pins PWR -, + and d and c go into Analog in pins 2, 3, 4 and A5 respectively on the Arduino board. Basically this just means blug it into the bottom left pins so that the LED is over the board as in the photo.
The Arduino can get power directly from the mains or from a USB cable. We power ours using a USB cable which is the bottom grey cable in the photo. The orange cable is the Cat 5 (standard) ethernet cable. Just plug the cables in.
In order to install the software you'll need to connect the USB cable to a computer. Once that's done let's look at the software.
Installing the Software
To be able to write software for the Arduino you'll need to install the Arduino IDE. This is the only software you'll need.
The Arduino IDE is available from http://www.arduino.cc/en/Main/Software for Linux, Mac OS X or Windows. Be sure to get 0.14 or above because the 0.13 version has a bug in the Ethernet library it ships with which prevents the Arduino from reconnecting to the Can I Turn It On? website which means it will always remain the same colour which isn't very useful.
Tip
The Arduino IDE is written using a Java library called processing but to program the Arduino you write C-like code in the IDE which get's compiled to machine code for the Arduino processor. Don't get confused and think the Arduino itself runs Java, it doesn't.
I'm running Ubuntu Intrepid Ibex 8.10 on a 64-bit Mac Book air. I've tested 0.14 and 0.15 and they both work well.
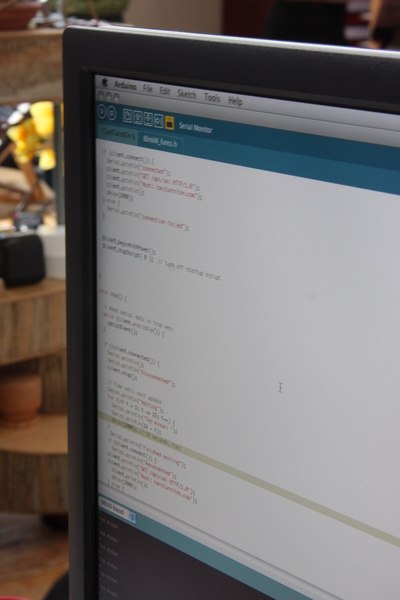
To get the Arduino IDE running I needed to install the following software:
$ sudo apt-get install openjdk-6-jdk avr-libc gcc-avr librxtx-java build-essential
Contrary to what other people have found I found Arduino did work with the OpenJDK. If you prefer to use the non-free Sun version of Java you can install this instead of openjdk-6-jdk:
$ sudo apt-get install sun-java5-jre
Then tell your system to use the non-free version:
$ sudo update-alternatives --config java
I also installed the 32bit compatibility libraries because I'm running a 64bit system:
$ sudo apt-get install ia32-libs
Now get the software and extract it:
$ cd Desktop
$ wget http://arduino.googlecode.com/files/arduino-0015-linux.tgz
$ tar zxfv arduino-0015-linux.tgz
$ cd arduino-0015
There are detailed instructions for lots of different platforms at http://arduino.cc/en/Guide/HomePage and you'll be pleased to hear that installation on Windows and Mac OS X is even easier.
Once everything is installed you can start the IDE by running the arduino command:
$ ./arduino
You'll see this:
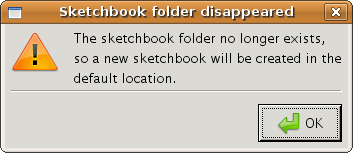
A sketch is a set of code files and libraries which together produce a program which can be run on the Arduino. You'll need to create a folder to store sketches you create yourself so press OK.
Next on 64bit Linux you might see this error (Windows and Mac OS X users are fine):
Exception in thread "main" java.lang.UnsatisfiedLinkError: /home/james/Desktop/arduino-0015/lib/librxtxSerial.so: /home/james/Desktop/arduino-0015/lib/librxtxSerial.so: wrong ELF class: ELFCLASS32 (Possible cause: architecture word width mismatch)
    at java.lang.ClassLoader$NativeLibrary.load(Native Method)
    at java.lang.ClassLoader.loadLibrary0(ClassLoader.java:1751)
    at java.lang.ClassLoader.loadLibrary(ClassLoader.java:1676)
    at java.lang.Runtime.loadLibrary0(Runtime.java:822)
    at java.lang.System.loadLibrary(System.java:993)
    at gnu.io.CommPortIdentifier.<clinit>(CommPortIdentifier.java:83)
    at processing.app.Editor.populateSerialMenu(Editor.java:903)
    at processing.app.Editor.buildToolsMenu(Editor.java:800)
    at processing.app.Editor.<init>(Editor.java:190)
    at processing.app.Base.<init>(Base.java:149)
    at processing.app.Base.main(Base.java:104)
This is because the Java serial library is for the wrong architecture. It looks like a scary error but it is easily fixed. You've just installed the correct version of the library so you don't need the wrong one distributed with Arduino. Press Ctrl+C to stop the program and rename the library and copy the correct one across:
$ mv lib/librxtxSerial.so lib/librxtxSerial.so.incorrect
$ cp /usr/lib/librxtxSerial.so lib/
Then start arduino again:
$ ./arduino
You'll get the same pop up message. Click OK and you'll see this:
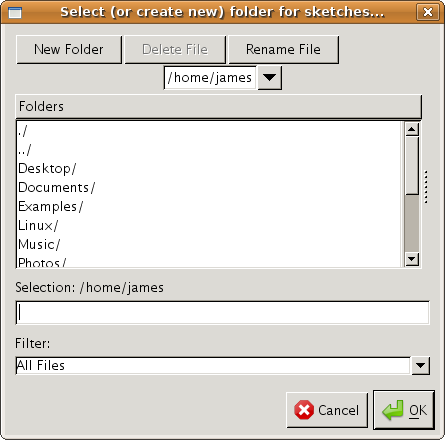
I chose /home/james/Deskop/sketches as the directory for my sketches. The IDE itself now loads:
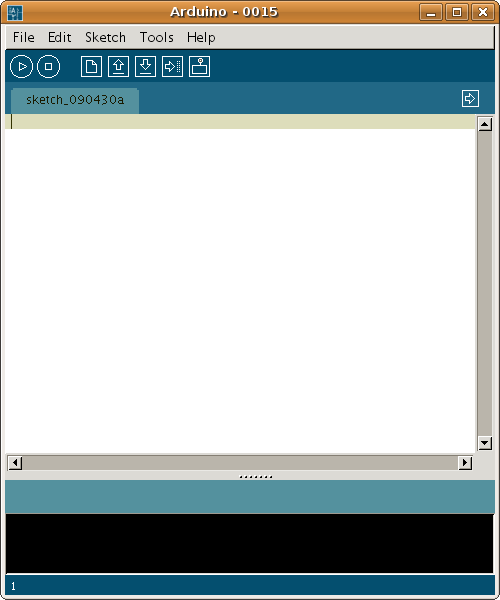
This is the main window into which you'll write code to run on the Arduino. Here's the code. Copy and paste it into the IDE:
//////////////////////////////////////////////////////////////////////////
// Tea Light source code, largely cut and pasted from existing code on  //
// the web                                                              //
//                                                                      //
// The majority of this code is based on XTalker/Bob.S's code on the    //
// arudino forums:                                                      //
// http://www.arduino.cc/cgi-bin/yabb2/YaBB.pl?num=1231812230           //
//                                                                      //
// String parsing C code from JeffTanner:                               //
// http://www.daniweb.com/forums/showthread.php?p=640773                //
//                                                                      //
// What's left (all 5 lines of it..) by James Gardner                   //
// (http://jimmyg.org) and Chris Adams (http://chrisadams.me.uk)        //
//                                                                      //
// Public domain: use responsibly, have fun!                            //
//////////////////////////////////////////////////////////////////////////

// Include description files for other libraries used (if any)
#include <string.h>
#include <Ethernet.h>
#include <stdlib.h>
#include "Wire.h"
#include "BlinkM_funcs.h"

//
// We need a converter to parse the frequency of the grid.
//
bool string_to_float( char str[], float &number )
{
  char num;
  double div=1;
  number=0;
  int i=0, decimal=0;
  bool p=false;
  while (str[i] != '\0')
  {
    num=str[i];
    if ( (num=='0')
      ||(num=='1')
      ||(num=='2')
      ||(num=='3')
      ||(num=='4')
      ||(num=='5')
      ||(num=='6')
      ||(num=='7')
      ||(num=='8')
      ||(num=='9')
      )
    {
      number=number*10;
      number=number+float(num-'0');
    }
    else if (num=='.' && !p)
    {
      p=true;
      i++;
      continue;
    }
    if (p)
    {
      decimal++;
    }
    i++;
  }
  if ( p )
  {
    for (int j=0;j<decimal;j++)
    {
      div=div*10;
    }
  }
  number=number/div;
  return true;
}

//
// Let's set up the ethernet shield
//

// Ethernet vars
byte mac[] = { 0xDE, 0xAD, 0xBE, 0xEF, 0xFE, 0xED };
byte ip[] = { 10, 10, 63, 219 }; // local ip for the tealight
byte server[] = { 89, 16, 186, 36 }; // caniturniton.com

// Start Cthernet client
Client client(server, 80);

// This is the function which gets called when the Arduino turns on
void setup()
{
  // Set up a serial connection to the IDE for debugging
  Serial.begin(9600);

  // Send some messages to the Arduino IDE
  Serial.println("Starting WebWx");
  Serial.println("connecting...");

  // Set up the Ethernet sheild
  Ethernet.begin(mac, ip);
  // Wait for a second
  delay(1000);

  // Implement a very simple HTTP client
  if (client.connect()) {
    Serial.println("connected");
    client.println("GET /api/xml HTTP/1.0");
    client.println("Host: caniturniton.com");
    client.println();
    // Give the server 2 seconds to respond
    delay(2000);
    // The server response is handled in loop()
  } else {
    Serial.println("connection failed");
  }

  // Initialise the BlinkM
  BlinkM_beginWithPower();
  BlinkM_stopScript( 0 ); // turn off startup script
}

// This function gets called constantly as fast as the Arduino can call it
// it is only the delay() calls which prevent it getting called hundreds of
// times a second
void loop() {

  // Read serial data in from web:
  while (client.available()) {
    // Process the XML
    serialEvent();
  }
  if (!client.connected()) {
    Serial.println();
    Serial.println("Disconnected");
    client.stop();
    // Time until next update
    Serial.println("Waiting");
    for (int t = 1; t <= 15; t++) {
      Serial.println("Tea minus: ");
      Serial.println(16 - t);
      delay(1000);
    }
    Serial.println("finished waiting");
    if (client.connect()) {
      // Get the latest update from caniturniton.com
      Serial.println("Reconnected");
      client.println("GET /api/xml HTTP/1.0");
      client.println("Host: caniturniton.com");
      client.println();
      delay(2000);
    } else {
      Serial.println("Reconnect failed");
    }
  }
}

//
// Now we need some code capable of parsing the very simple XML feed
//

// Max string length may have to be adjusted depending on data to be extracted
#define MAX_STRING_LEN 20
// Setup vars
char tagStr[MAX_STRING_LEN] = "";
char dataStr[MAX_STRING_LEN] = "";
char tmpStr[MAX_STRING_LEN] = "";
char endTag[3] = {'<', '/', '\0'};
int len;
// Flags to differentiate XML tags from document elements (ie. data)
boolean tagFlag = false;
boolean dataFlag = false;

// Process each XML character returned
void serialEvent() {
   // Read a char
   char inChar = client.read();
   if (inChar == '<') {
      addChar(inChar, tmpStr);
      tagFlag = true;
      dataFlag = false;
   } else if (inChar == '>') {
      addChar(inChar, tmpStr);
      if (tagFlag) {
         strncpy(tagStr, tmpStr, strlen(tmpStr)+1);
      }
      // Clear tmp
      clearStr(tmpStr);
      tagFlag = false;
      dataFlag = true;
   } else if (inChar != 10) {
      if (tagFlag) {
         // Add tag char to string
         addChar(inChar, tmpStr);
         // Check for </XML> end tag, ignore it
         if ( tagFlag && strcmp(tmpStr, endTag) == 0 ) {
            clearStr(tmpStr);
            tagFlag = false;
            dataFlag = false;
         }
      }
      if (dataFlag) {
         // Add data char to string
         addChar(inChar, dataStr);
      }
   }
   // If a LF, process the line
   if (inChar == 10 ) {
      // Find specific tags and print data.
      // This is where we get the frequency from and where we set the colour
      if (matchTag("<frequency>")) {
         Serial.print("Frequency: ");
         Serial.print(dataStr);
         float f;
         int red = 0;
         int green = 0;
         string_to_float(dataStr, f);
         if (f > 50.0) {
             green = 255;
         } else {
             red = 255;
         }
         Serial.print(" Red: ");
         Serial.print(red);
         Serial.print(" Green: ");
         Serial.print(green);
         // Now set the BlinkM to the correct colour
         BlinkM_fadeToRGB(0x000, red, green, 0 );
      }
      if (matchTag("<recommendation>")) {
         Serial.print(", Recommendation: ");
         Serial.print(dataStr);
         // XXX Not sure about this line:
             //client.stop();
      }

      // Clear all strings
      clearStr(tmpStr);
      clearStr(tagStr);
      clearStr(dataStr);

      // Clear Flags
      tagFlag = false;
      dataFlag = false;
   }
}

// Other Functions related to the XML parsing above

// Function to clear a string
void clearStr (char* str) {
   int len = strlen(str);
   for (int c = 0; c < len; c++) {
      str[c] = 0;
   }
}

//Function to add a char to a string and check its length
void addChar (char ch, char* str) {
   char *tagMsg = "<TRUNCATED_TAG>";
   char *dataMsg = "-TRUNCATED_DATA-";
   // Check the max size of the string to make sure it doesn't grow too
   // big. If string is beyond MAX_STRING_LEN assume it is unimportant
   // and replace it with a warning message.
   if (strlen(str) > MAX_STRING_LEN - 2) {
      if (tagFlag) {
         clearStr(tagStr);
         strcpy(tagStr,tagMsg);
      }
      if (dataFlag) {
         clearStr(dataStr);
         strcpy(dataStr,dataMsg);
      }
      // Clear the temp buffer and flags to stop current processing
      clearStr(tmpStr);
      tagFlag = false;
      dataFlag = false;
   } else {
      // Add char to string
      str[strlen(str)] = ch;
   }
}

// Function to check the current tag for a specific string
boolean matchTag (char* searchTag) {
   if ( strcmp(tagStr, searchTag) == 0 ) {
      return true;
   } else {
      return false;
   }
}
As you can tell, this code really has been hacked together and isn't too pretty but it does work.
You'll need to change two lines to get this code to work for you. The ip variable is that address of the caniturniton.com server. When you visit the site in a browser the browser does a DNS lookup to work out this address for you, on the Arduino you have to do code it manually. The IP shouldn't change (at least not often but you can find the latest IP like this:
$ ping caniturniton.com
PING caniturniton.com (89.16.186.36) 56(84) bytes of data.
64 bytes from 89-16-186-36.no-reverse-dns-set.bytemark.co.uk (89.16.186.36): icmp_seq=1 ttl=57 time=26.0 ms
The number above in brackets is the IP address.
Here are the two lines you need to update:
byte ip[] = { 10, 10, 63, 219 }; // local ip for the tealight
byte server[] = { 89, 16, 186, 36 }; // caniturniton.com
You'll also need to give the Arduino an IP address that it can use on the local network. The easiest way to do this is to find out the IP address your computer is using and then change the last number until one of them works. They often start 192.168... as well as 10.10... in our example.
Save the project by choosing File->Save from the menu:
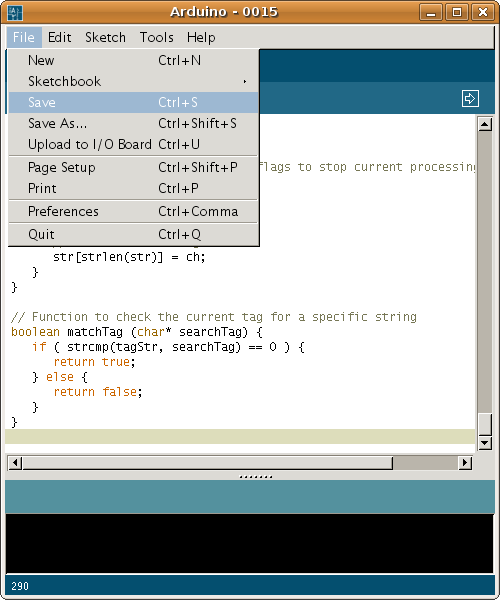
You'll see a new directory appear in the sketches folder you chose earlier and it will contain a .pde file. This is your Arduino project file but it doesn't actually contain your code yet. Save the project again and everything saves correctly.
Setting up the Libraries
In order to use the BlinkM you need to install a library, otherwise you'll get errors like this:
26: error: BlinkM_funcs.h: No such file or directory In function ‘void setup()’:
 In function ‘void serialEvent()’:
Visit http://thingm.com/products/blinkm and click on the EXAMPLE CODE link towards the bottom of the left hand column then extract the code. Alternatively, from the command line:
$ cd Desktop
$ wget http://thingm.com/fileadmin/thingm/downloads/BlinkM_Examples.zip
$ unzip BlinkM_Examples.zip
There are a lot of examples to play with:
$ cd BlinkM_Examples/
$ ls
BlinkMChuck       BlinkMColorList     BlinkMCylon  BlinkMScriptTool    BlinkMScriptWriter2  docs
BlinkMColorFader  BlinkMCommunicator  BlinkMMulti  BlinkMScriptWriter  BlinkMTester         other-examples
We'll take the header file we need from one of them.
Copy BlinkM_funcs.h file from the BlinkMChuck example into your the folder for this sketch then choose Sketch->Add File from the menu:
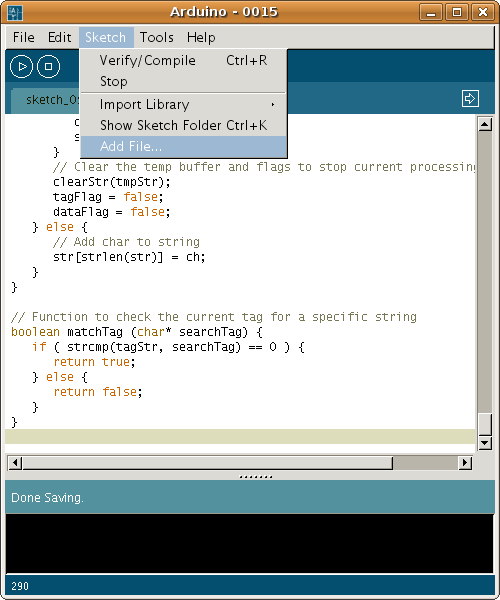
Select the BlinkM_funcs.h file.
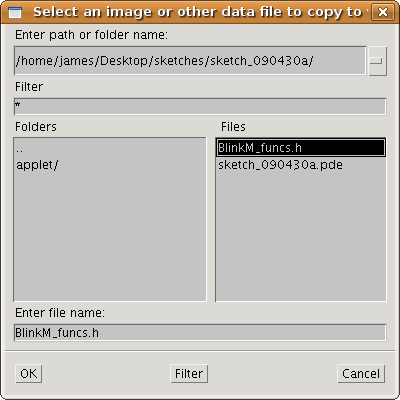
Now save the project again.
Testing the Code
With the code pasted into the IDE, the Arduino assembled and plugged in and with the necessary adjustments to IP addresses made, you are ready to test the code.
First of all use the verify button to check the code is OK:
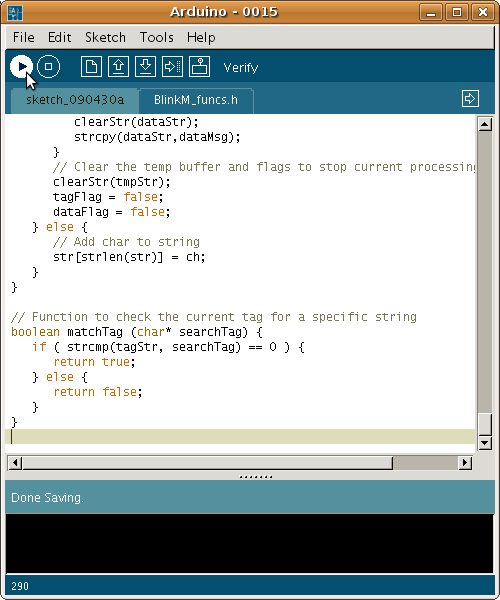
You might get an error like this at the bottom:
Couldn't determine program size: text data bss dec hex filename
If you do, just press Verify again and you'll see this:
Binary sketch size: 9914 bytes (of a 14336 byte maximum)
Choosing a Serial Port
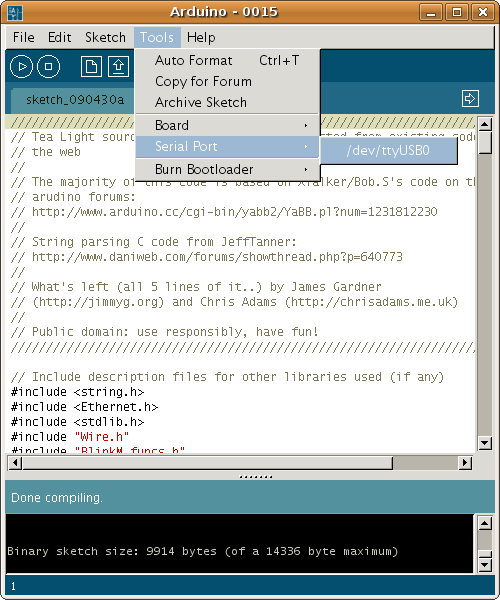
Before you can upload the code you need to tell the Arduino IDE which serial port you are using. If you forget you'll get an error saying Serial port 'COM1' not found.
Choose the correct serial port from the Tools menu. If there is more than one you may have to try each of them if you aren't sure which one to use:
Upload to Board
You can now upload the binary sketch to the Arduino board. Click the Upload to Board button:
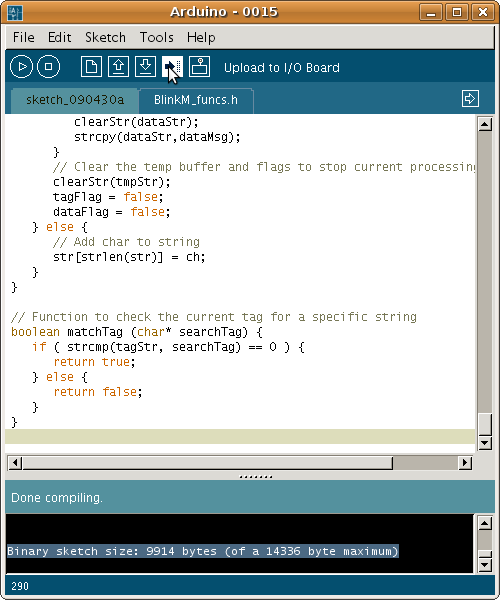
During the upload you will be able to see the small orange TX and RX lights on the Arduino board itself as the data is being transmitted. If the upload is successful you'l see this, otherwise try again.
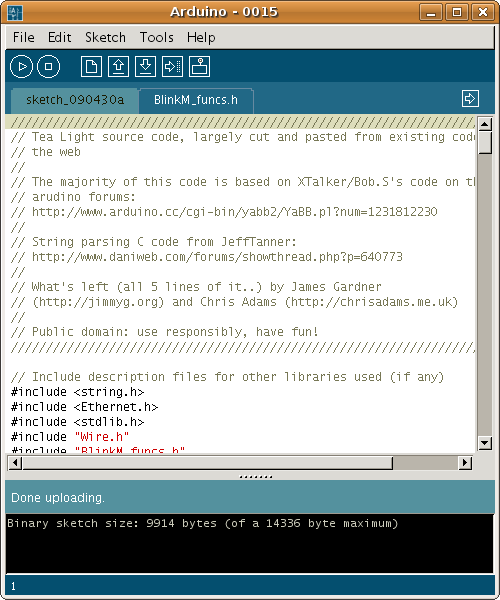
At this point you'll want to load the serial monitor to be able to see the debug output the Arduino is produing.
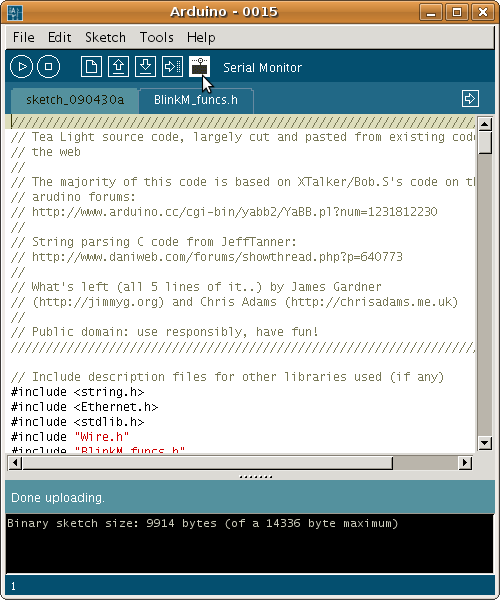
Make sure the baud is set to 9600 as this is what we set up in the code itself. If all goes well the Arduino should be glowing green or red and sending its output back to the IDE. If not, just press the reset button on the Arduino's Ethernet sheild and try again.
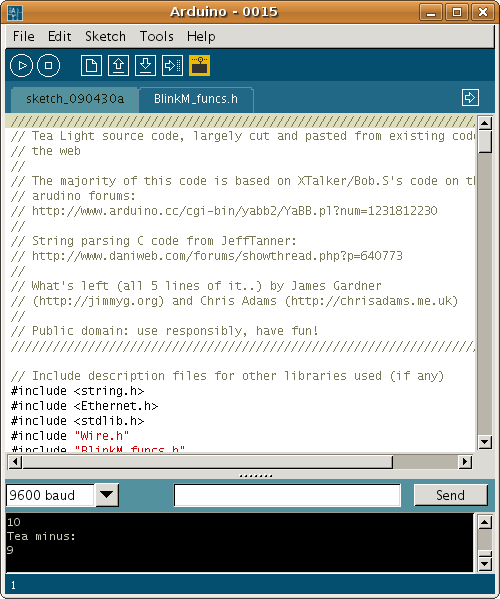
Here's the serial output prodced over a few minutes:
Starting WebWx
connecting...
connected
Frequency: 50.06 Red: 0 Green: 255, Recommendation: Yes
Disconnected
Waiting
Tea minus:
15
Tea minus:
14
Tea minus:
13
Tea minus:
12
Tea minus:
11
Tea minus:
10
Tea minus:
9
Tea minus:
8
Tea minus:
7
Tea minus:
6
Tea minus:
5
Tea minus:
4
Tea minus:
3
Tea minus:
2
Tea minus:
1
finished waiting
Reconnected
Frequency: 50.06 Red: 0 Green: 255, Recommendation: Yes
Disconnected
Waiting
Tea minus:
15
Tea minus:
14
Tea minus:
13
Tea minus:
12
Tea minus:
11
Tea minus:
10
Tea minus:
9
Tea minus:
8
Tea minus:
7
Tea minus:
6
Tea minus:
5
Tea minus:
4
Tea minus:
3
Tea minus:
2
Tea minus:
1
finished waiting
Reconnected
Frequency: 50.06 Red: 0 Green: 255, Recommendation: Yes
Disconnected
Waiting
Tea minus:
15
Tea minus:
14
Tea minus:
13
Tea minus:
12
Tea minus:
11
Tea minus:
10
Tea minus:
9
Tea minus:
8
Tea minus:
7
Tea minus:
6
Tea minus:
5
Tea minus:
4
Tea minus:
3
Tea minus:
2
Tea minus:
1
finished waiting
Reconnected
Frequency: 50.06 Red: 0 Green: 255, Recommendation: Yes
Disconnected
Waiting
Tea minus:
15
Tea minus:
14
Tea minus:
13
Tea minus:
12
Tea minus:
11
Tea minus:
10
Tea minus:
9
Tea minus:
8
Tea minus:
7
Tea minus:
6
Tea minus:
5
Tea minus:
4
Tea minus:
3
Tea minus:
2
Tea minus:
1
finished waiting
Reconnected
Frequency: 50.06 Red: 0 Green: 255, Recommendation: Yes
Disconnected
Waiting
Tea minus:
15
Tea minus:
14
Tea minus:
13
Tea minus:
12
Tea minus:
11
Tea minus:
10
Tea minus:
9
Tea minus:
8
Tea minus:
7
Tea minus:
6
Tea minus:
5
Tea minus:
4
Tea minus:
3
Tea minus:
2
Tea minus:
1
finished waiting
Reconnected
Frequency: 50.06 Red: 0 Green: 255, Recommendation: Yes
Disconnected
Waiting
Tea minus:
15
Tea minus:
14
Tea minus:
13
Tea minus:
12
Tea minus:
11
Tea minus:
10
Tea minus:
9
Tea minus:
8
Tea minus:
7
Tea minus:
6
Tea minus:
5
Tea minus:
4
Tea minus:
3
Tea minus:
2
Tea minus:
1
finished waiting
Reconnected
Frequency: 50.06 Red: 0 Green: 255, Recommendation: Yes
Disconnected
Waiting
Tea minus:
15
Tea minus:
14
Tea minus:
13
Tea minus:
12
Tea minus:
11
Tea minus:
10
Tea minus:
9
Tea minus:
8
Tea minus:
7
Tea minus:
6
Tea minus:
5
Tea minus:
4
Tea minus:
3
Tea minus:
2
Tea minus:
1
finished waiting
Reconnected
Frequency: 50.09 Red: 0 Green: 255, Recommendation: Yes
Disconnected
Waiting
Tea minus:
15
Tea minus:
14
Tea minus:
13
Tea minus:
12
Tea minus:
11
Tea minus:
10
Tea minus:
9
Tea minus:
8
Tea minus:
7
Tea minus:
6
Tea minus:
5
Tea minus:
4
Tea minus:
3
Tea minus:
2
Tea minus:
1
finished waiting
Reconnected
Frequency: 50.09 Red: 0 Green: 255, Recommendation: Yes
Disconnected
Waiting
Tea minus:
15
As you can see, the fluctionations happen over a fairly short time period.
Running Standalone
Once the binary sketch is installed on the Arduino. This means you can close the IDE (save your work first) or unplug the Arduino and next time you turn it on it will begin its work of recommending when you can make tea in the least damaging way.
At this stage the USB cable is only used for power so you can plug it in anywhere, not just into the computer you used for writing the software.
You can now add your lampshade and deploy the tea light in your kitchen.
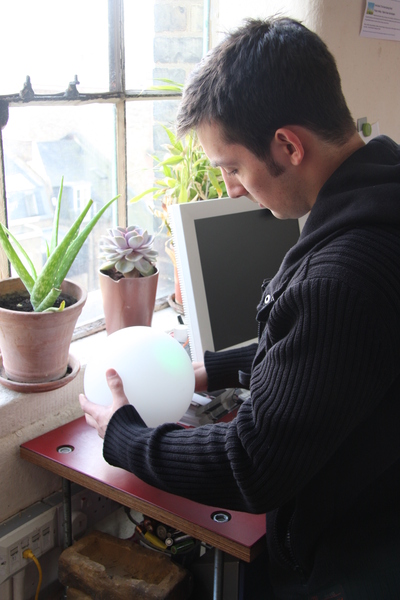
People are bound to be interested in the glowing orb so it is a good oppurtunity to talk about the grid, carbon and related topics.
Happy hacking!
Downloads
Here are the downloads I used, mirrored here in case the original links ever disappear.
Useful Links
- Chris Adams' excellent Tea, Arduino and Dynamic Demand post
- Can I Turn It On?: presentation, JSON API, XML API
- The main Arduino site
- The IDE Buttons
- Arduino Langauge Reference
- Arduino Foundations
Other Tea Lights
Let me know where you are deploying your own tea-light or Arduino energy device and I'll keep a list here.